Everyone got some important and interesting pictures on their phones and this is the same with Samsung Galaxy Note users. We all love to store our memorable pictures so that we can always look at them.
But in some cases, you can lose your precious and important images and other stuff from your respective Samsung devices. Even though Android has a user-friendly interface, they are not secure from damages due to attacks. So, it means that your photos are not secure on your phone.
Try to imagine that you have deleted some of your important photos and see how it feels. Nobody wants to find themselves in a situation where just pressing the delete button can remove all your photos.
This situation is so irritating and you might get pissed off as some of the deleted pictures might be erased and you don’t know how to get them back.
If you don’t know how to recover those deleted photos, then keep calm and don’t try to do something stupid like trying to reset or restart your device.
We have curated this article to help you in retrieving the deleted pictures from your Samsung Galaxy Note 10/Note 9/Note 8/S10/S9/S8.
1. Recover deleted pictures from Android phone directly without backup
2. Restore recently deleted pictures from Google Photos
3. Tips: How to back up your photos on Samsung Galaxy
3.1. Transfer photos from Samsung Galaxy to PC
3.2. Sync your Gallery to Samsung Cloud
The first step of trying to recover your lost pictures is trying to retrieve them from the available backup. There are several ways in which you can store your data to handle lost data, situations such as Google Drive, Samsung Cloud and many more.
These backups ways can surely help you in getting your lost data from Samsung Android devices only when you have created a backup. But what if you haven’t backed up? You should move to the next available options to retrieve your deleted pictures from Samsung Galaxy Note 10/Note 9/Note 8/S10/S9/S8.
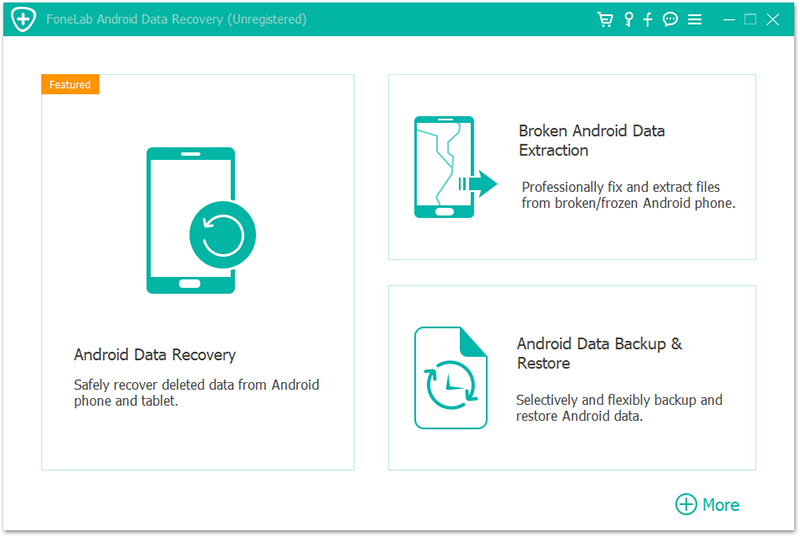
Here is a wonderful and easy trick to retrieve deleted pictures from Samsung Galaxy Note and S devices. The process involves the use of Android Data Recovery toolkit, that lets you recover data from any situation like accidental deletion, operating system failure, rooting and many more.
Advantages of Android Data Recovery toolkit
· Retrieves all the lost/ deleted videos, audios, images, text messages and contacts without backup.
· Recovers lost data in any event without any issues.
· Allows preview and recovery of deleted contents.
· Supports 6000+ Android devices and various Android OS.
· Has the highest recovery rate in the industry.
· Recover photos directly from broken devices and SD cards.
For the recovery process to be effective, make sure that you stop adding new data to your Samsung Galaxy devices. Why? Adding new data means you are overwriting the deleted data. This means that those deleted pictures will be lost forever.
How to recover deleted pictures using Android Data Recovery toolkit
1. Launch the toolkit
First, you need to download and install Android Data Recovery on your computer and run it. Then choose to Recover among all the options.
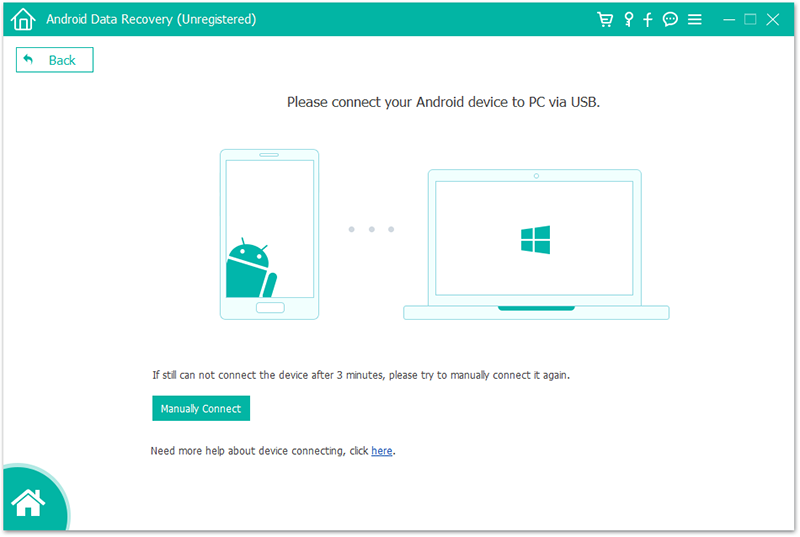
2. Connect your Samsung Galaxy Device
Connect your Samsung Galaxy device to the computer. You must ensure that your phone’s battery is at least at the 20% level for you to conduct this process easily and effectively.
Make sure you have enabled USB debugging on your Samsung Galaxy device. If you haven’t, then turn to the device and enable it before you continue.
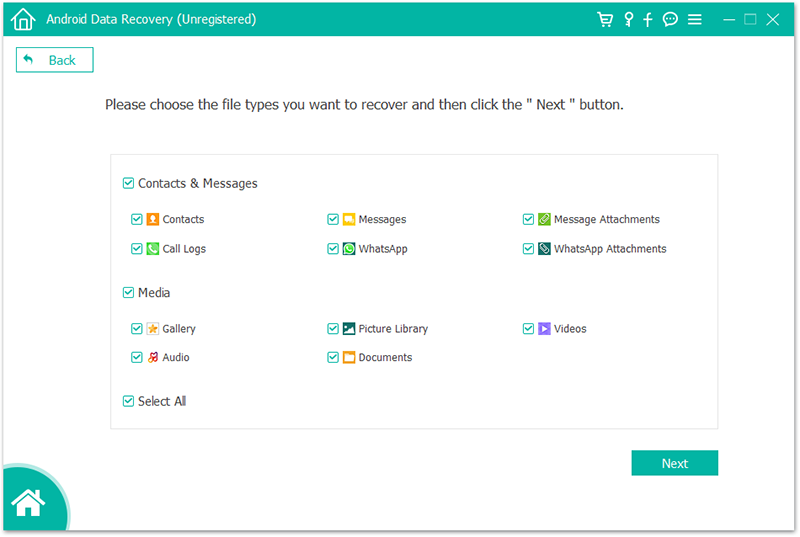
3. Select file types to scan
Once the connection is established between your phone and computer, this software will show all the data types it supports to restore. On the pop-up window, you will see that all the data types are checked by default. Select Gallery and then tap Next to continue.
After that Android Data Recovery tool will scan the Samsung Galaxy phone completely to restore deleted photos. The process will take some few minutes, so be patient.
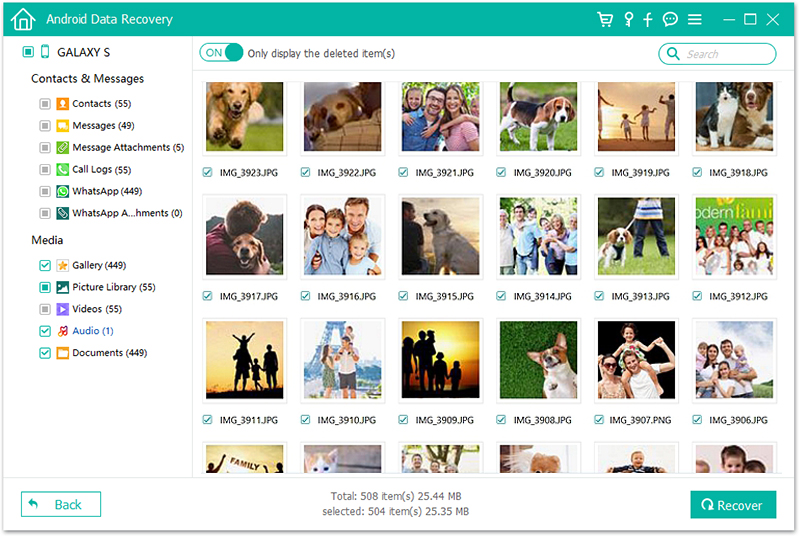
4. Preview and Recover deleted pictures on Samsung Galaxy Note 10/Note 9/Note 8/S10/S9/S8.
After the scanning process is completed, you can preview the recovered files one by one. Look for the pictures you wish to retrieve and click on Recover to save them all on your computer.
You might have deleted your photos from your Samsung Galaxy Note 10/Note 9/Note 8/S10/S9, but they are still recoverable if your pictures have been synced using Google Photos.
However, there is a catch. You need to recover the deleted pictures from your Samsung Galaxy within 60 days or else they will be deleted form Google photos trash. If this happens your picture now will be lost forever.
Below are steps to recover deleted pictures from Google photos:
Step 1: Login to your Google account on Google photos app.
Step 2: Hit the Menu button (the 3 horizontal bars on the top-left)
Step 3: Tap Trash
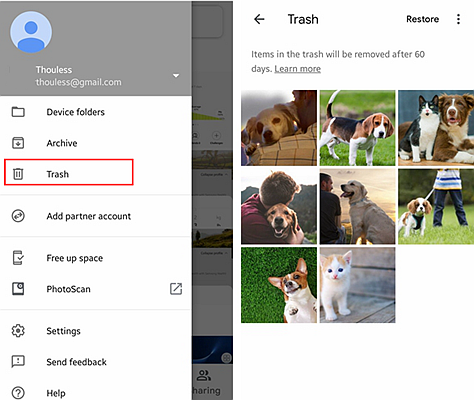
Step 4: Select Photos, and tap Restore

You can transfer any of the photos you have taken from Samsung Galaxy devices, like Samsung Galaxy Note 10, Note 9, Note 8, S10, S9, and S8, to your PC for storage, sharing and editing. This process can be achieved manually by use of a USB cable, though there more sophisticated and automated methods out there.
So, how do you transfer your Samsung Galaxy photo to your PC?
· First, ensure that you connect your smart phone to your PC using your phone’s USB cable.
· When asked to Allow access to phone data, click Allow to accept.
· Once the connection is established, swipe down from the top of the screen to have access to your notifications.
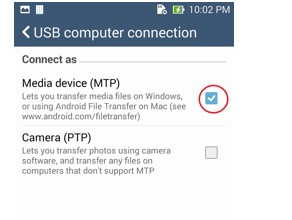
· Click on the notifications from the Android System. It will prompt you to Tap for other USB options.
· Select the MTP option that allows Transferring files or Transferring Images.
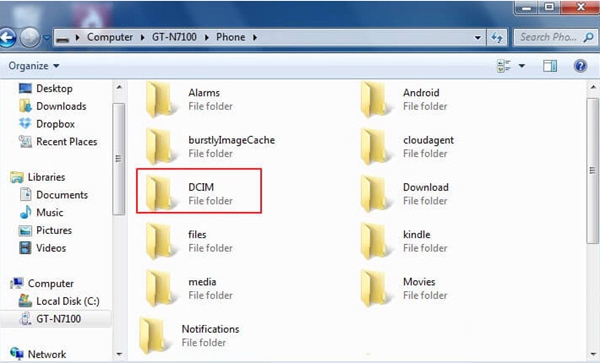
· Now that you have a complete transfer connection, your device will appear as an available drive. You can locate your device on the PC by opening your File Explorer. Look for your device down the left-hand column. Next tap on tour device to open it.
· Tap on your Device again. If you have an external SD card it will be displayed here.

· By opening your device, you can be able to see all the files you have stored on your device. Your photos will be located in the DCIM folder. If you have stored your photos on your SD, the DCIM folder containing your photos will be located on the SD.
· Choose Photos that you wish to transfer and drag -drop them into a folder saved on your PC.
There are photos you love and find them more important than others, like your first-time photos, family holiday picture, and many others. It is always a good idea to set your Gallery to sync automatically to Samsung Cloud. This way you can restore pictures and also videos that were mistakenly deleted.
Here is how to sync your gallery to Samsung cloud:
1. Go to Settings. Click Accounts and backup.
2. Tap on Samsung Cloud.
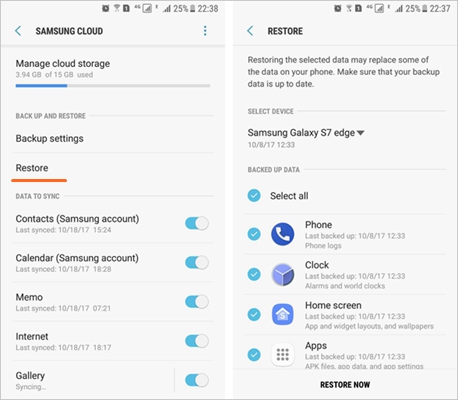
3. Click Gallery and then select Albums to Upload.
4. Finally tap Switch ¸ to go to your desired album’s
Pictures can easily get lost or deleted, but it wouldn’t be a big problem if you regularly back up your files. For this reason, you should use the best backup resources available. If you are more concerned about your data’s security, then try to find apps and cloud storages that keeps your files with top-notch encryption. Try to come up with hard to crack passwords and always remember to log out before closing a window.
Additionally, you can always set automatic syncing for your Android device so you don’t have to manually move your files.