Videos and music hit differently even if you are in a dull mood. It makes the day alive and lovely. I bet your music and video collection is sublime. But what if all of a sudden you lose all music and videos? Maybe you have deleted them by mistake or your phone has decided to play dumb and experienced a system failure. Can you still be able to retrieve all your deleted music on your Android phone or tablet?
Yes, it is possible to recover all the deleted photos and videos. How? By using effective data recovery software. Also, if you have created backups or sync your music and videos to your Google account, then you can still recover them.
How to recover deleted videos and music without backup
Ways to back up your videos and music
Backups is always an issue, most of us forget to create backups especially if our Android devices are working perfectly. So, is it possible to recover your lost data when you haven’t created backups? Yes, it possible with the use of a third-party recovery software- Android Data Recovery.
It makes the recovery of deleted files such as music and videos possible, even without backups. When music and videos are deleted, they are not gone. Instead, they just become invisible and stored in a virtual space where it becomes re-writable.
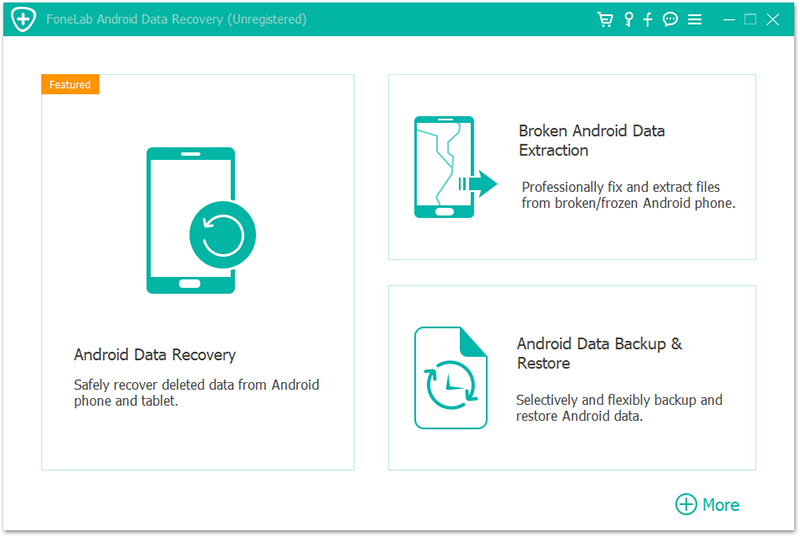
Advantages of Android Data Recovery Toolkit
1. Supports a variety of file formats such as: .mp4 , .avi, m4a, .mp3, .ac3, .wav,.flac, and more.
2. Provides both Mac and Windows users a free trial version, to get back the deleted music and videos from Android phones.
3. Supports a variety of Android devices including Samsung, LG, Moto, Google Pixel, OnePlus, Huawei, Oppo, Vivo, Xiaomi, etc.
4. Allows Android users to preview and select what type of file they wish to recover from their Android phones and tablets.
5. It’s easy to use and doesn’t require the need for any technical expertise.
Lest find out how we can utilize the FoneLab toolkit to get your music and videos back.
Step 1: Download and Install FoneLab to your PC.
You first need to download the FoneLab toolkit and install it on your PC by following the on-screen instructions.
Once this is completed, launch the program and tap on Data Recovery under More tools.
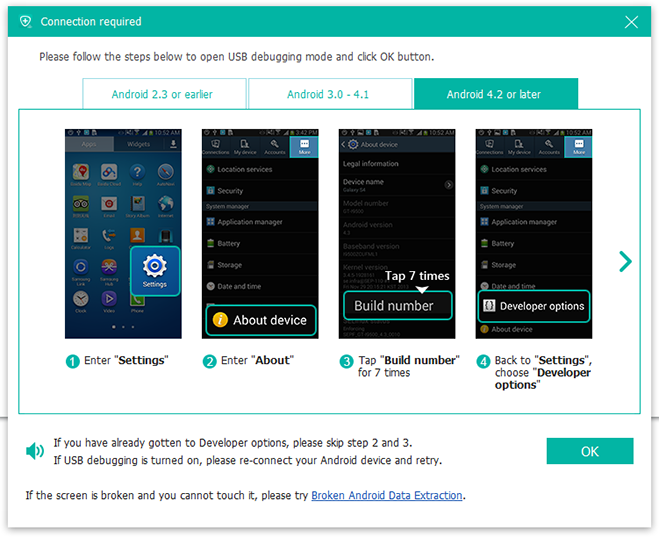
Step 2: Connect the Android device to PC
To make a connection between your PC and your Android device, make use of a USB cable. Then, turn on the USB debugging option and allow the debugging process.
For the different Android devices versions, use the following step to turn USB debugging on.
Android 4.2 and higher (The newest Android 9, Android 10, etc.)
• Open setting on your Android phone or tablet.
• Navigate to the bottom and click on “About Phone”.
• Search for the build number and tap it 7 times to activate the developer mode. After that you will see the message saying “You are under developer’s mode”.
• Return to settings. Then click and enable developer mode.
• Finally, check the USB Debugging.
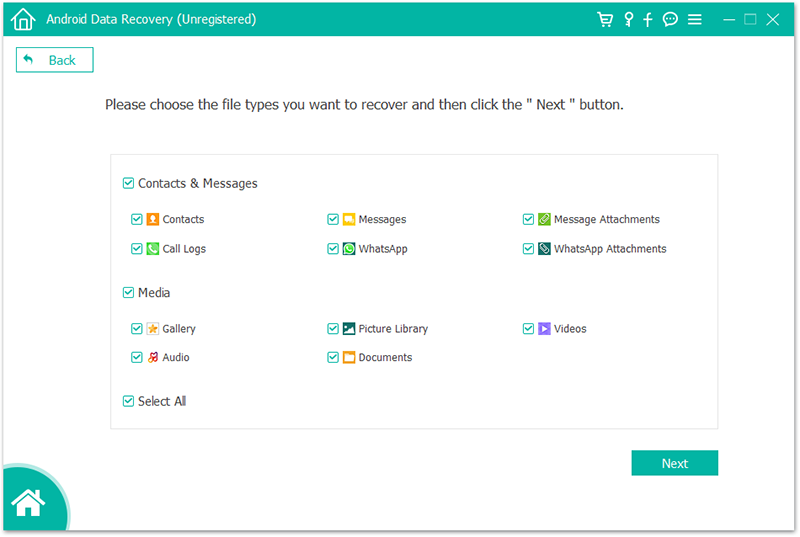
Step 3: Select the music and videos file type to scan
So, that you can retrieve deleted music, you need to select music and video files among the available file types for recovery.
It’s your choice to choose, whether to scan all the given files or individual files. In our situation, we will have to check the music and video boxes and then click “Next”.
Step 4: Authorize FoneLab software
For the scanning process to continue, FoneLab Data Recovery software will prompt you for permission to access your Android device and scan it. You may have to click allow when the popup message appears on your Android device screen.
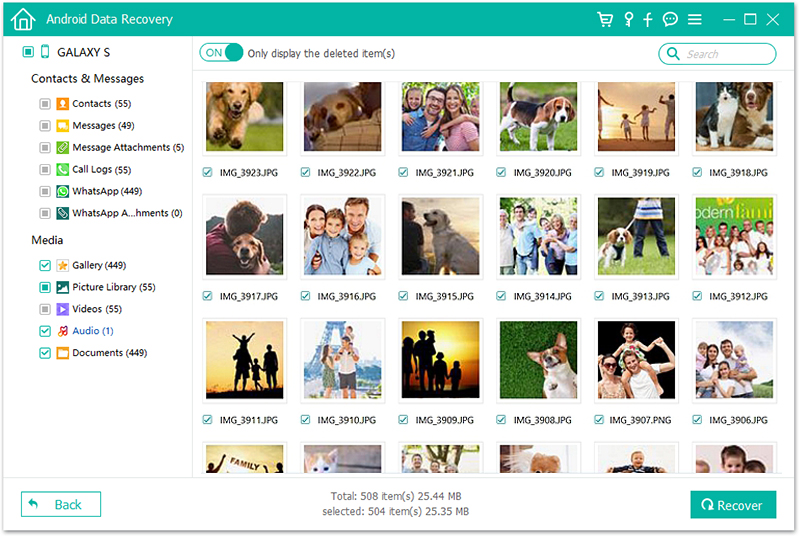
Step 5: Preview, Select and Recover
As soon as the scanning process stops, you will see a list of all the recovered music and video files on the interface. From there, you can select the file types (Videos and music) you wish to retrieve.
Select “Recover” by clicking the recover button at the bottom of the screen. After this, a folder will be created and saved on your PC.
For most people, the phone is the primary camera and speaker. In such cases, it contains highlights of your life and the music you like. Therefore, you don’t want to lose this vital data. That why it can be very frustrating when you lose your phone or tablet.
If your Android device gets damaged or lost, don’t worry! There are many services out there, which can safely store your music and videos in the cloud. The best part of cloud storage is that you can retrieve all those photos and also share them easily from anywhere.
Let’s have a keen look at these services.
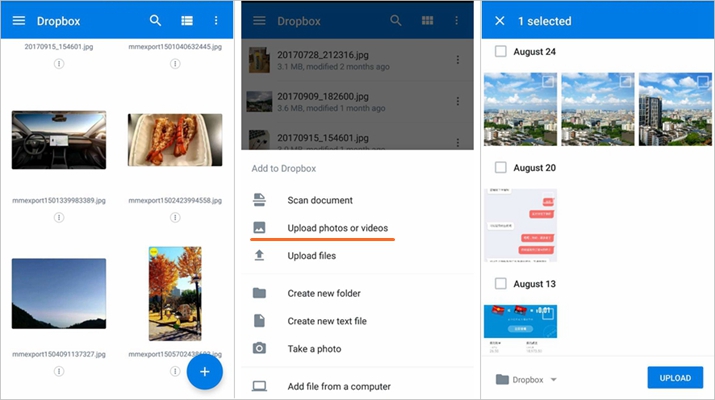
“Dropbox” I bet you know this cloud service or maybe you have heard of it. It is one of the oldest cloud storages. It offers fast services and easy to use interface. To use it you have to first download it, then log in with your account.
• Once this is done, click “Allow”
• Next, Dropbox will offer to back up your music and videos. Click “Backup”.
• Click “Allow” in the permission box that will open.
What if you are already a user? Then that is quite simple.
• On your phone screen tap” My apps”
• Next Click” My files”
• Select the file type you want to upload. In our case, we want to upload music and videos.
• Choose the document or data you wish to upload to Dropbox by ticking the box next to the document.
• Then, click the share icon.
• Select a folder within Dropbox to hold your data. By default, it will be the last folder you used. If you are happy with the folder destination, click “Add”.
• Once this is done your music and videos, will be uploaded to Dropbox.
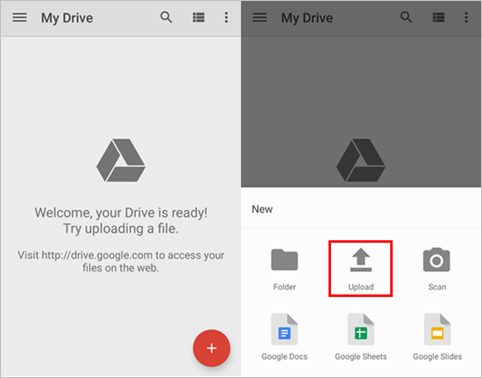
Google Drive gives you 15GB worth of storage space, that’s like 4000 songs. This cloud storage is ubiquitous; as long as you have an internet connection, you can access your Google Drive.
Having a Gmail account automatically qualifies you for Google Drive. You can download your music and videos to listen and watch offline. Also, everything can be shared via a link to a file or a folder even with non-Google users,
Its set up is quite easy, you are just required to sign in with your Gmail address and password.
From there, click the + button to upload your music and video files and videos. You can upload as many files and folders as you wish. If your 15 GB is over. Download the files to your PC and transfer them to an external hard drive.
For window users
To transfer your music and videos to your computer from your Android device, use a USB cable. It works for every Android device ranging from Samsung (like the newest Galaxy S10/Note 10), LG (G8/V50), Moto (G7), Sony, etc. This works perfectly and the only limiting factor is your hard disk space. Also, it pretty easy to do.
Windows users have it easy. Once they have connected their Android devices to the computer via a USB cable and enable the MTP mode, the Windows Explorer window will open the phone’s content right there for taking.

To move your music, just drag and drop to the place you want to store your music and let the copying process to complete.
Once you are done, eject the Android phone or tablet from the icon like any other USB device.
For Mac Users
For mac users, you will need a special utility to move music and videos from your Android phone or tablet onto your computer. An example of such utility is Android File transfer.
It is easy to use. All you need to do is to download it, install it, and let the magic happen. As soon as you connect your Android device to your Mac, the software will automatically run.
Once you are granted access, you will be able to access all the files stored on your device. For music and videos, you can just drag and drop music and videos at will into folders on your computer.
The best part here is that you can drag and drop entire folders into a finder window, without the necessity of having to tap, hold and select all.