Losing pictures from an Android device is fairly easy especially you haven’t back up your photos to PC or turned on Google Photos backup. Some unfortunate circumstances can result in you formatting your bricked/frozen phone or simply where the data evaporates into thin air after system update, and you have no idea what happened. This is why creating backup drives is extremely important. Don’t worry this data is still retrievable if you follow the given steps closely.
1. Recover deleted photos from Android phone directly without backup
2. Restore recently deleted photos from Google Photos
3. Tips: How to sync your photos to Google Photos
The most basic method to recover your deleted photos is recovering directly from your device using a third party tool kit if one does not have a backup of those images. We recommend you use Android Data Recovery toolkit. By using Android Data Recovery, lost data in the form of contacts, videos, photos, and messages as well as calendars, call logs and other in-app data can be retrieved.
The app runs on windows and mac both. It is compatible with every Android device from Samsung (Galaxy S10, Note 10), LG (LG G8, V50), Motorola (Moto G7), Sony, OnePlus, etc in all Android version include the latest Android 10.0. You can perform an extensive scan with this kit to recover your lost data.
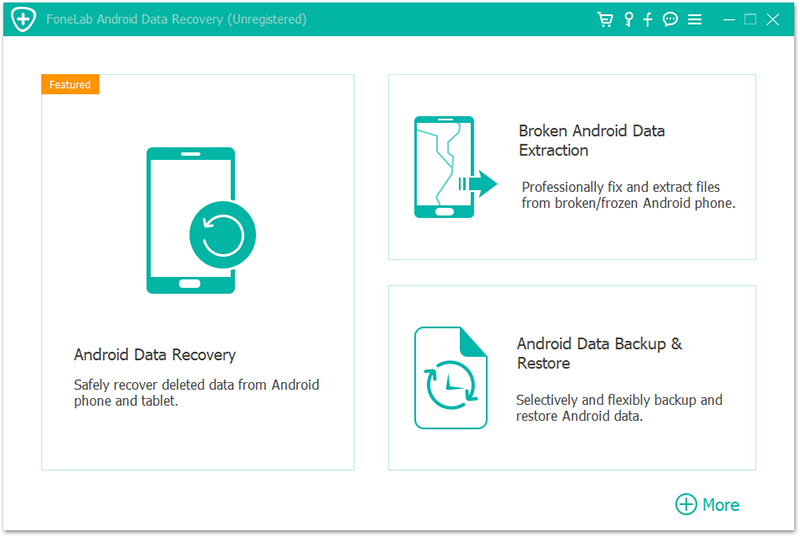
Step 1. Launch the software on your laptop or computer and select “Android Data Recovery” on the left of the window.
Step 2. Plug in your Android phone with the data cable to your computer.
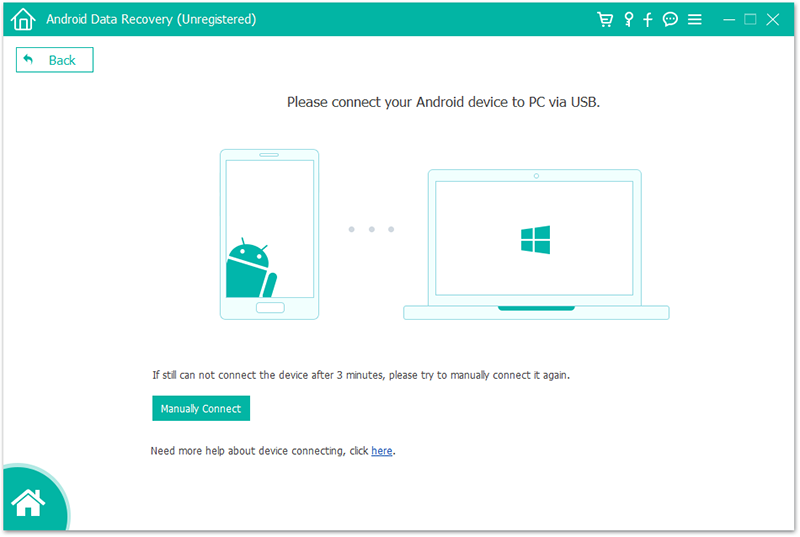
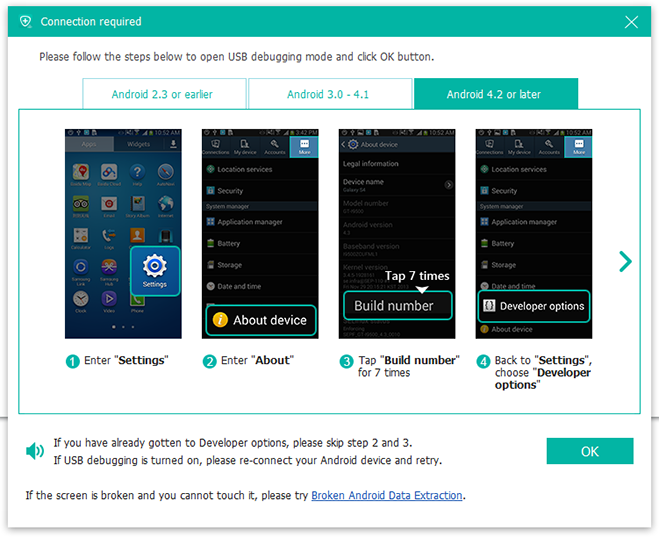
Enable the USB debugging on your device; this allows the software to access your phone’s storage.
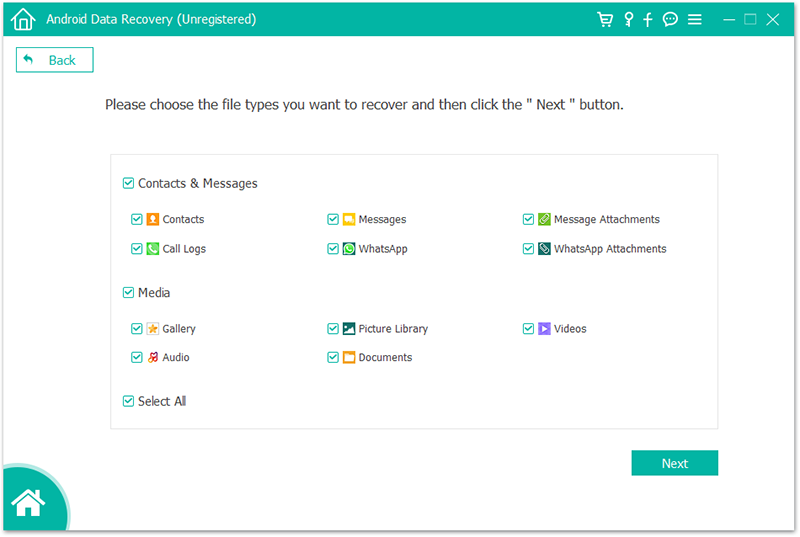
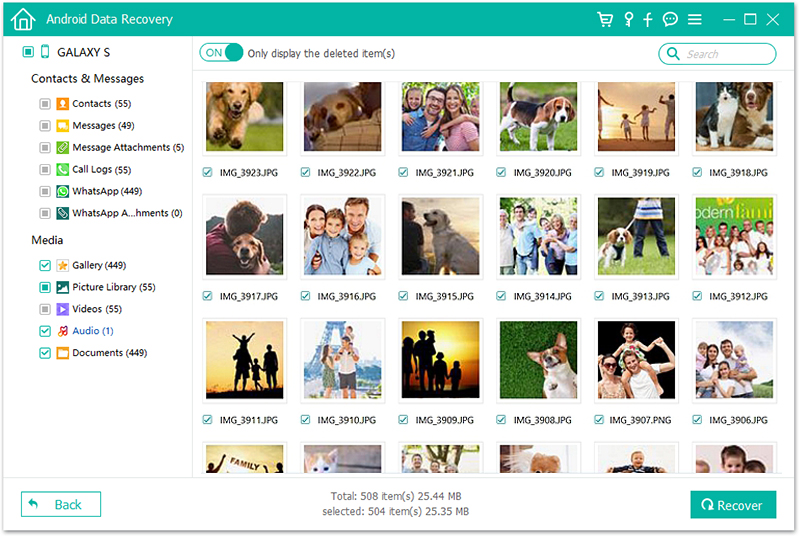
Step 3. A list of all the type of files you want to recover will pop up, check the one that says “gallery” and any other type of file that you want to recover and press the button that says “next” to continue.
The software will begin to scan your device to check for any traces of the data you lost. For the first timers, we recommend using the “standard” option as it mostly gets the task done. In the case, it doesn’t then choose the advanced one as an alternate option to try later. Press “start” to continue.
The scan will take some time, so hold on tight.
Step 4. When the scan is complete, you can now view a list of all the data retrieved from your device. You can preview it as you like and select those you prefer to recover.
On choosing “recover,” it will ask you for a directory to save the retrieved files on. You can directly recover them on to your device as well as on to your laptop computer.
Most android devices identify with Google photos as their main backup directory so if you are likely to have backed up your photos to Google photos and would like to recover your lost data using Googles services then follow the following guide to help you get hold of your lost data.
When you delete photos from your Google account, the photos are not permanently deleted. The system stores those files in a temporary folder labeled trash for about 60 days’ time period. After 60 days are over the contents of the trash folder are completely gotten rid of. So if you still have time, you can still restore them to your device.
To restore images from Google photos, open Google photos app and select the folder “trash” from the menu option or open the link photos.Google.com/trash. You will be redirected to a new page with all the images deleted in the past 60 days.
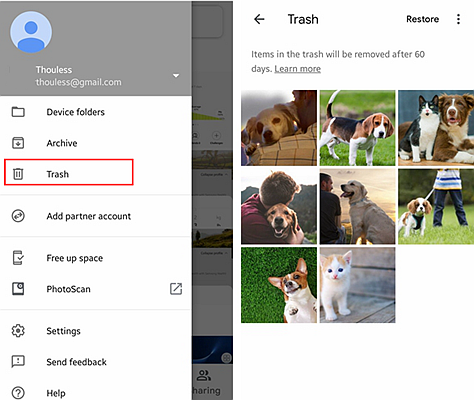
Select and restore the photos according to your preference. You can further access these photos in the Photos section.

There is a slight chance that you can recover photos that were permanently deleted after the 60 days time period. This is may be possible if you deleted photos from your laptop or phone storage and as well as from Google photos including the trash folder. In such a situation you can contact Google drive’s customer support team who will further help you in restoring the file for you. This can only be successful if you’ve exceeded the time period further by 21 days. However, you need to make your case in order to get the customer support team to help you out.
To submit your request navigate to the “contact us” page and open “missing or deleted files” and contact them either by email or chat services. You can further obtain help through call as well.
To prevent such a situation from occurring in the first place you can sync your photos to Google Photos. This will keep a backup of all your important images and avoid any stressful situation in the long run. We would recommend using this especially if you are a professional photographer and since your work revolves around these photos, it should be your utmost priority to have high-quality backups. This section will provide you with some great tips on how to get started with Google photos.
To sync your photos perform the following steps:
Begin by downloading the Google photos app using the Google play store. Skip, if you already have the app.
1. Open Google photos app.
2. Sign in with your Google account
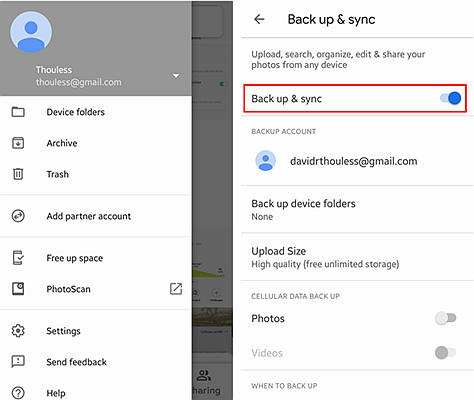
3. Go to the main menu and choose Settings. Tap on ‘Back up & Sync’
4. Choose your preferred quality of the pictures in settings.
Wait while Google begins to sync your entire photo library to its cloud services.
You can choose the folders you want Google to sync to its cloud libraries by following the steps mentioned below.
1. Launch the Google photos app
2. Tap the icon with three parallel lines on the top left corner of your screen (over flow icon)
3. Press the settings icon (the one that resembles a gear)
4. Select back up and sync your photos.