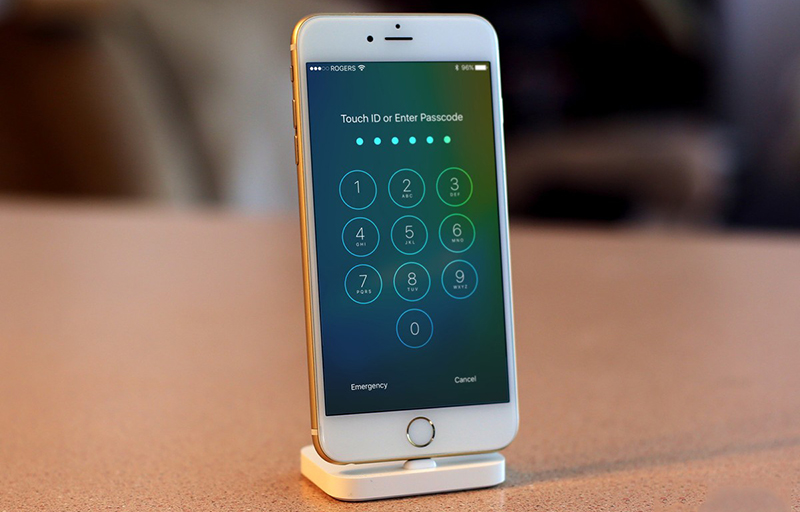
Have you ever forgot the password to unlock your iPhone? Disabled iPhone caused by wrong password is a bad thing but not the worst. You just need to do something to remove your passcode.
At least, you can first back up your phone data on your locked iPhone, and then restore your iPhone to remove the lock screen passcode. Here come three pieces of suggestions to backup your phone date from your locked iPhone.
Method 1: Restore Your iPhone to Bypass Passcode with iTunes
Method 2. Back up Your Phone Data and Erase iPhone to Remove Lock Screen
This method is in allusion to the situation that you have done backup on iTunes before. You should have connected your iPhone with iTunes before and haven’t restart your iPhone after you connected your iTunes since last time, or this way will malfunction because iTunes will require password when connecting your iPhone.
As mentioned below, you can restore your locked iPhone with iTunes and erase the passcode.
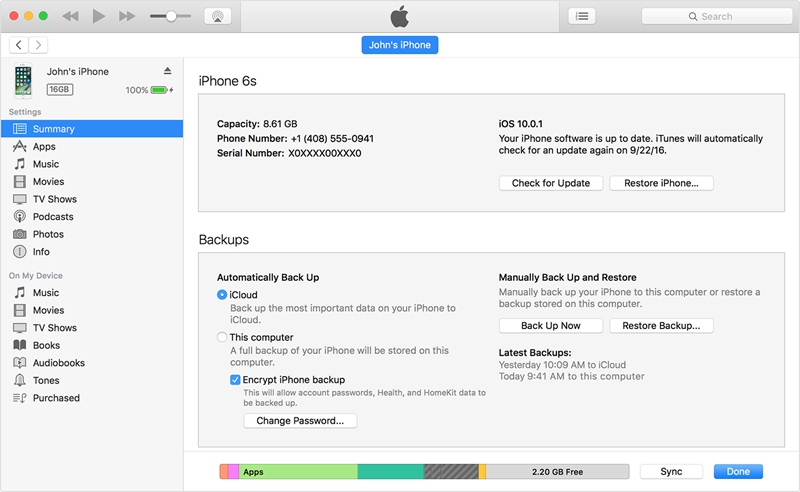
Launch iTunes and connect your iPhone to the computer you used to make an iTunes backup before.
Click “Back Up Now” button to back up iPhone data to the computer for a few seconds.
Next restore your iPhone by clicking “Restore iPhone” at the window.
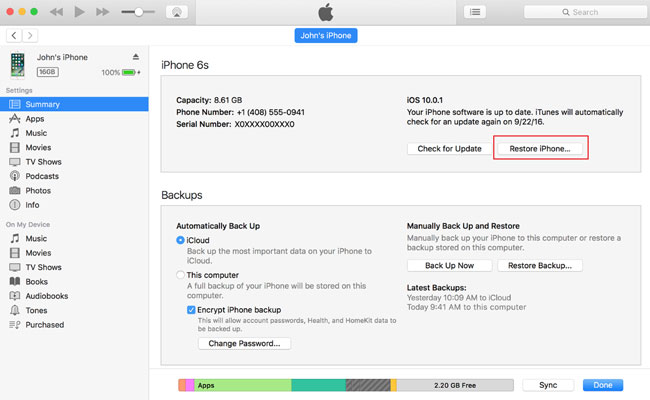
This will erase all data including your iPhone’s passcode just like a brand new iPhone, after which you can restore your iPhone from iTunes backup to get your data back.
Connect your iPhone to iTunes and click on “Restore Backup”.
Afterward, select your iTunes backup file you just baked up a moment ago from the backup files list. Do not disconnect your iPhone until the process has completed.
However, if you have never backed up with iTunes on your computer? Then iTunes may ask you to unlock your iPhone with password when you connect your iPhone in the first time. Don’t worry. Here comes another method for your resolution.
Without iTunes backup before, you can extract data from your locked iPhone directly with iPhone Backup & Restore toolkit. This tool supports to back up or export Phone data including messages, contacts, voice memos, photos, notes and any other data from locked iPhone directly. the tookit compatible with the new iPhone 13/ 13 mini/ 13 pro, iPhone 12, iPhone 11, iPhone X/XS/XR and earlier iPhone devices.
Download WinDownload Mac
Steps following will guide you.
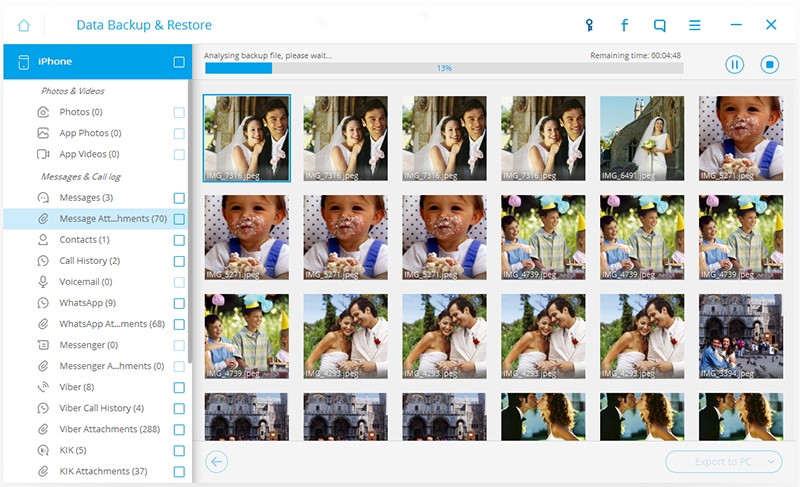
Extract data from locked iPhone with an iPhone Data Backup and Restore toolkit.
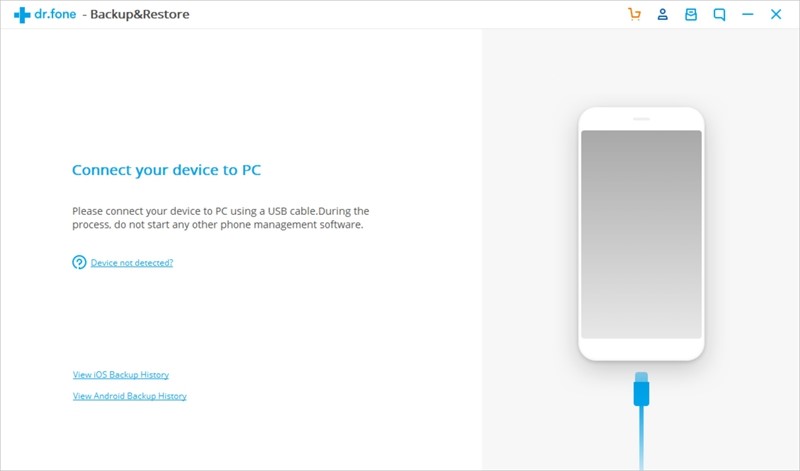
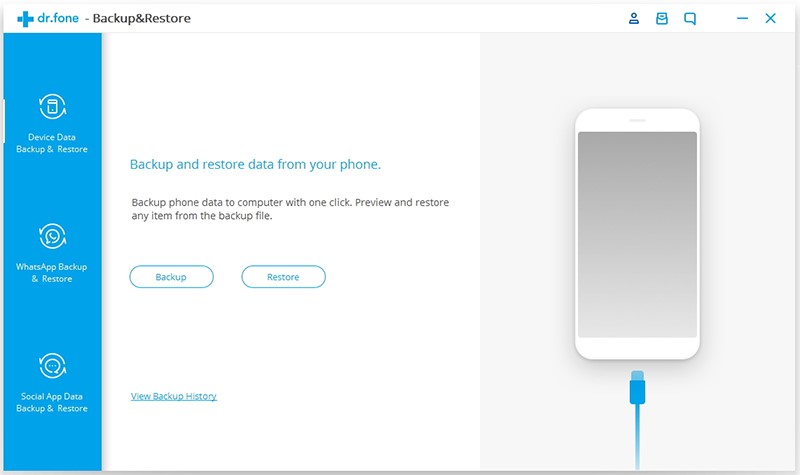
Install and Launch the software and select “Backup & Restore” from the interface.
Next Connect your iPhone to PC. The program will detect your iPhone automatically. Choose
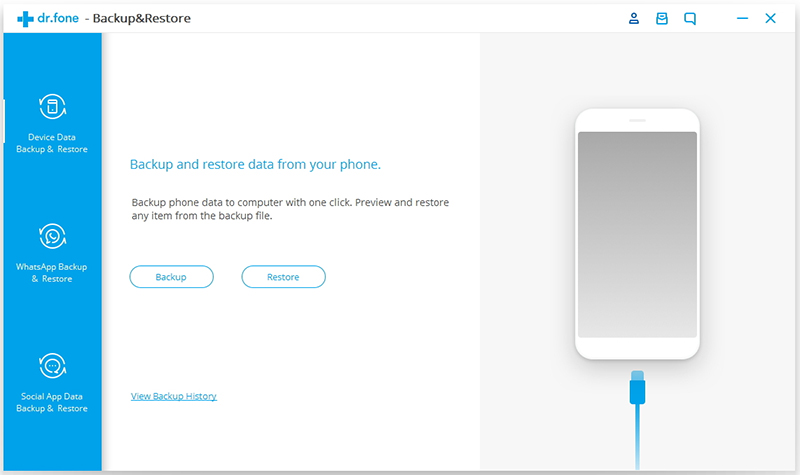
Next click on the “Backup” button.
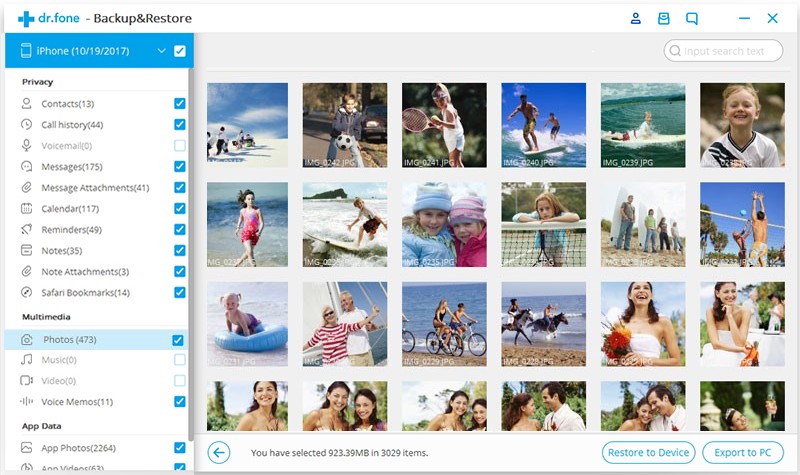
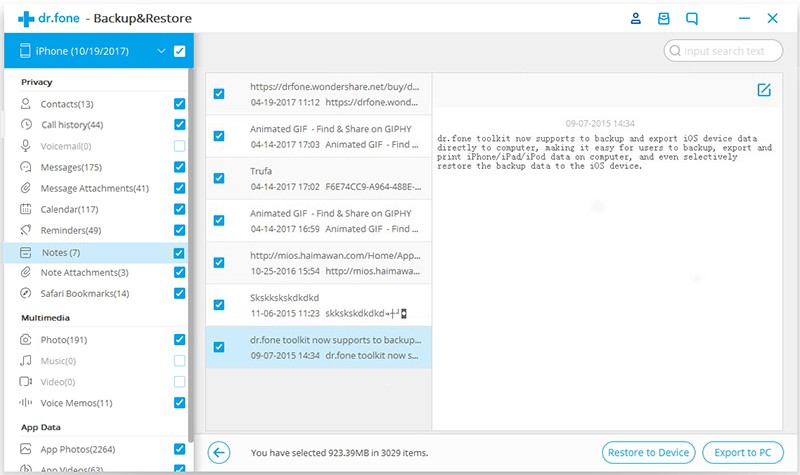
Now you can choose all the data types or selectively click on what you prefer to back up. Click on the button “Backup” and wait a few seconds for the software to scan and backup your chosen data types.
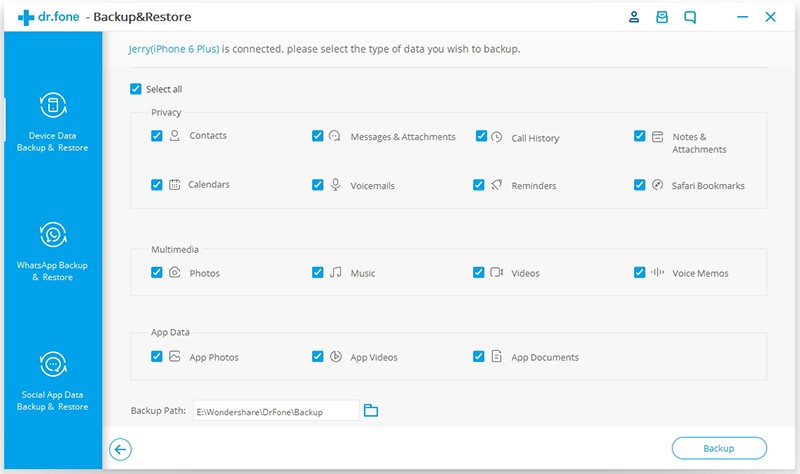
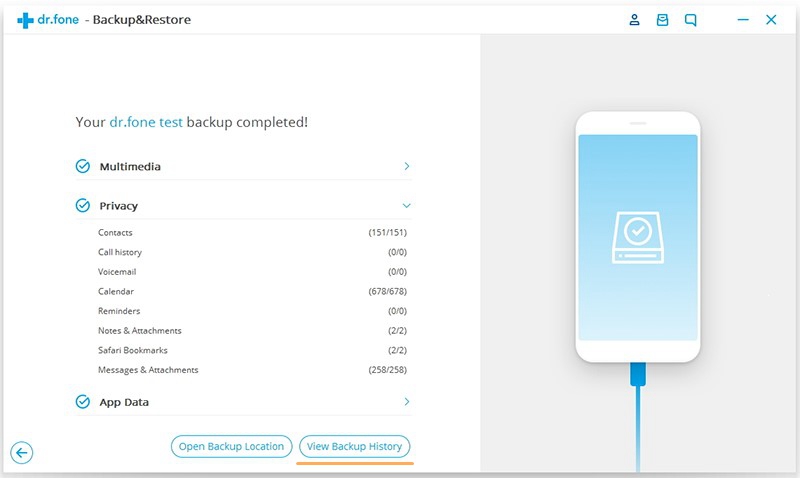
Wait until the software completes the iPhone backup process.
Once the backup has completed, you can click on “View Backup History” option to preview the data in the backup file or export to your computer.
This way requires your setting up Find My iPhone on your iPhone before, then you can erase your device with iCloud to remove your passcode.
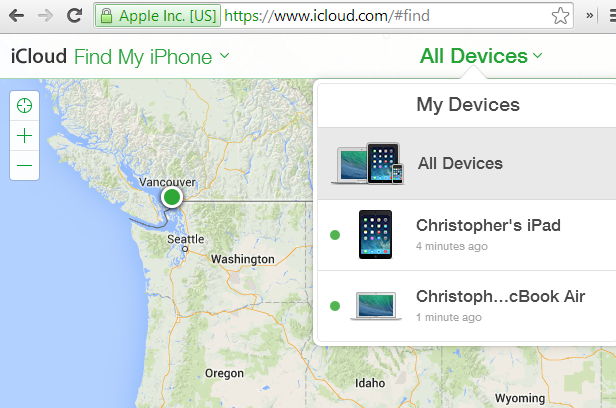
1. Go to iCloud website from computer browser and sign in your Apple ID, then choose “Find iPhone”.
2. Click “All devices” at the top of the browser window and choose your iPhone to erase.
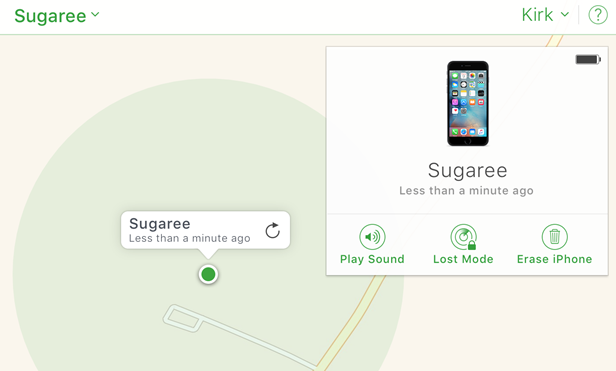
3. Click “Erase iPhone”to erase your device and its passcode.
1. Launch the software and select “Backup & Restore” from the interface. Connect your iPhone to computer.
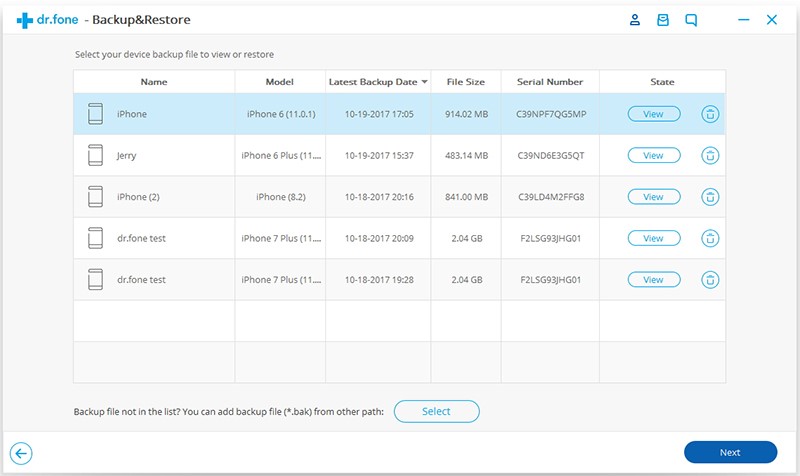
2. Next click on “Restore” button to restore data to your iPhone, or click on “View Backup History” to view your backup content only without connecting iPhone.
4. The software will display all your backup history. Just select the backup file you need and click on “View” button to go on.
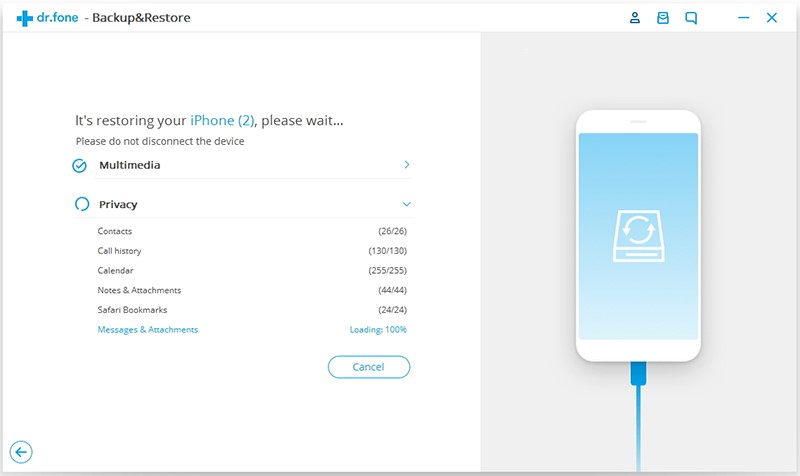
5. Wait until the scanning is finished, then you can preview the data on the window before restoring.
View what you want to restore and click “Restore to device”.
Note that photos could not be restored to iPhone directly but you can export the photos to PC then transfer to your iPhone later.
Other types of data can be restored to iPhone if you click “Restore to Device”. Do not cut down the work until it is done.
Through the above two methods we achieve to erase the passcode and restore all data of settings, photos, contacts, messages, notes, WhatsApp, Messenger and so on from iTunes or iCloud.
The first method has a precondition that you must have synced iPhone with iTunes on your computer before, so your iPhone will trust your computer and you don’t need to input your passcode.
Therefore the second method is outstandingly over the former, for iPhone Data Recovery will not ask you to input password to do backup and give a convenience to select the data and preview what you are backing up.