If you’ve been using an Android phone and now updates it to a new Android phone, like the hottest Samsung Galaxy S8/S7, HTC U, Moto Z/M, Sony Xperia XZ Premium or LG G6/G5, transferring contacts will likely be the first thing on your list of to-dos. In the following paragraph, I am going to introduce some efficient ways for transferring contacts from Android to Android.
Part 1: Transfer Contacts to Samsung via Samsung Smart Switch
Part 2: Transfer Contacts to LG Phone via LG Mobile Switch
Part 3: Transfer Contacts to Moto via Motorola Migrate
Part 4: Transfer Contacts to HTC via HTC Transfer Tool
Part 5: Transfer Contacts to Sony via Xperia Transfer Mobile
Part 6: Transfer Contacts Between any Android Phones via Phone Transfer
Samsung Smart Switch help you transfer your previous contacts, music, photos, calendar, text messages and more to your new Samsung. Here is one thing you should bear in mind, Samsung Smart Switch only supports Samsung phone as a receiver, which means iPhone or another Android phone should be the sender.
Step 1: There are two ways to run Samsung Smart Switch.
Tap in the following order: Setting > Backup and Reset > Open Smart Switch on your Samsung phone. If there is not this option, you have to download the Samsung Smart Switch from Google Play.
Note: Make sure you have launched Samsung Smart Switch on both Android phones.
Step 2: At the starting pages of your new Samsung phone, tap “WIRELESS” and “RECEIVE”. Then, choose the option “Android device” when asked to select old device. Meanwhile, take your old Android phone and tap “CONNECT”.
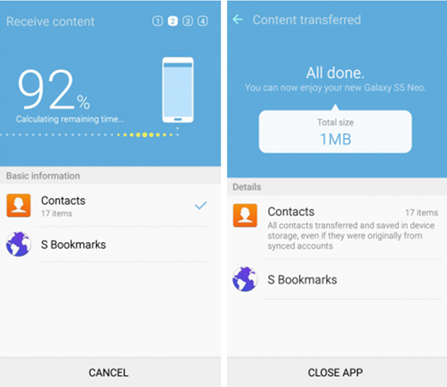
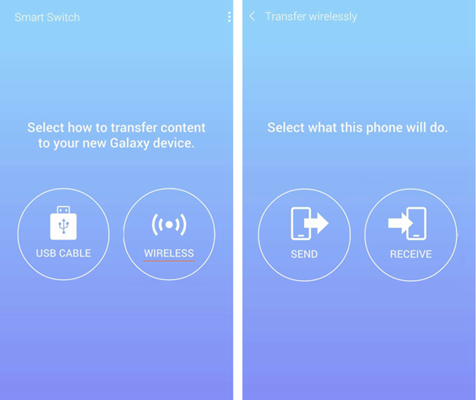 Step 3: After a short while, your two phones will be connected. By this time, you are supposed to see all kinds of data displayed on your old Android device. Choose item “Contacts” and tap “SEND” so that your previous contacts will be moved to the new Samsung phone.
LG Mobile Switch transfer most all of your phone’s data, such as contacts, SMS, photos, videos and more.
Step 1: On your new LG G6, go to the “Mangement” folder in home screen and open the App LG Mobile Switch (LG Backup), and tap Receive data.
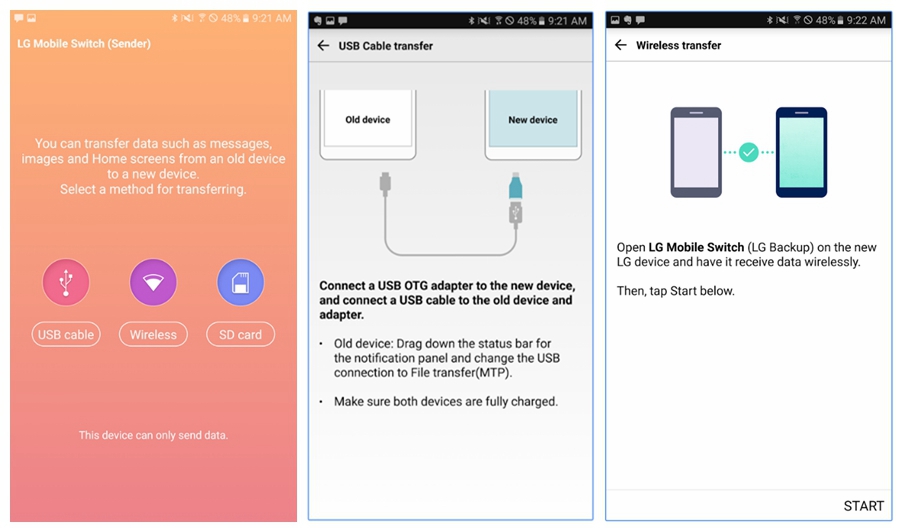
Step 2: On your old phone, download launch the app LG Mobile Switch (Sender). Tap Send data wirelessly and tap START after ensure both devices are ready.
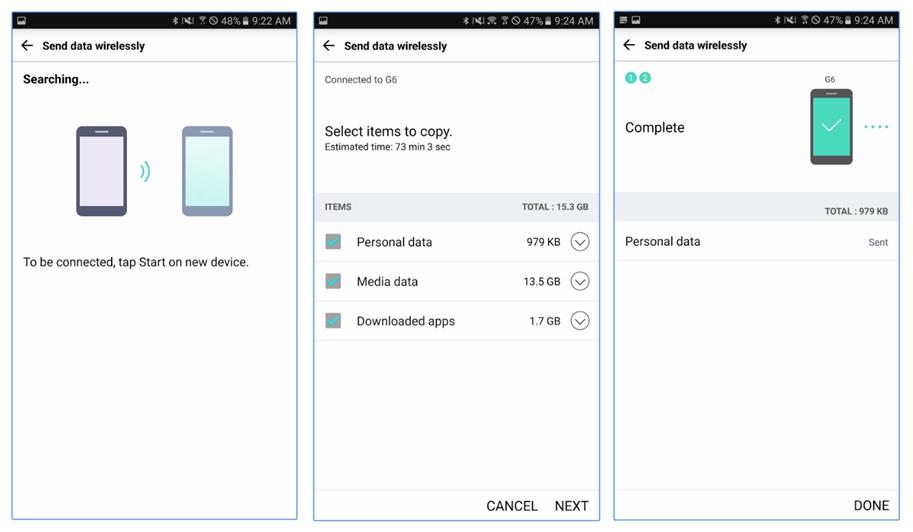
 Step 3: After selecting the name of your new LG phone on your old device, tap ACCEPT, review the Receive data prompt and tap RECEIVE on your new LG phone. Then, tap to check the items which you hope to transfer and hit the button NEXT on your old phone so that the data will transfer automatically.
Step 4: At last, tap DONE and RESTART PHONE on your old phone.
With the help of Motorola Migrate, you can move data from your old Android phone to your new Moto phone in just a few steps, wirelessly.
Step 1: This app – Motorola Migrate should have installed on both your old and new handsets. If it isn’t installed by default, you are advised to download it from Google Play Store.
Step 2: Start Motorola Migrate on your new Motorola phone, select Android when asked to choose your old phone type, pay attention that there is an arrow to open the list. Then, tap the button “Next”, tick any item that you wish to transfer over from your old device when seeing a list of data showed and hit “Next” to continue. Finally, tap CONTINUE when a pop-up window asks you if you are ready for using Migrate, which will take over your Wi-Fi connection to transfer your stuff.
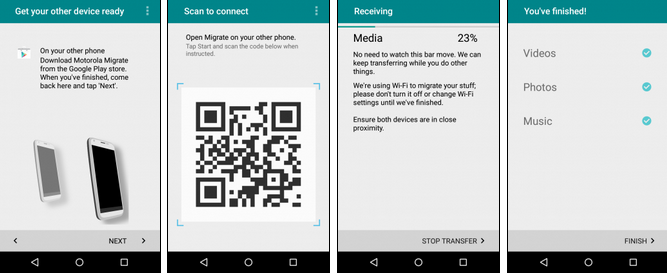
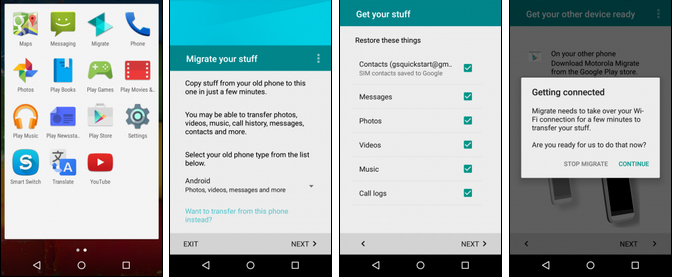 Step 3: After launching Motorola Migrate on your old Android phone, tap Next on both your two Android phones. A QR code is displaying on your new Motorola. Here you need to pick up your old phone to scan the code shown on your new phone. Then, you will be told that your wanted data is being transferred. Wait until a window “You’re finished” appears and you can tap Finish to complete the transfer process.
Note: Make sure both your phones are connected to Wi-Fi and, and keep patient here since the transfer process will take quite a long time.
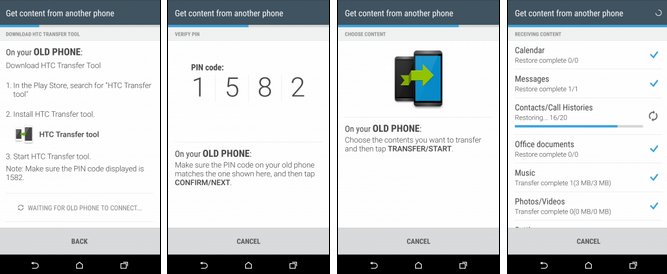
This simple software – HTC Transfer Tool uses Wi-Fi Direct to transfer your important data, like contacts, messages call logs, music and photos and more wirelessly to your new HTC phone.
Step 1: On your new HTC phone, tap on Settings and scroll down the page until you find the option “Get content from another phone”, then hit it. When asked to select your previous phone, you could either choose HTC or another Android phone as the case may be. Then, tap Allow to continue when a window pops up to ask permission to access to your device, and click Next to proceed transfer on the next page.
 Step 2: On your old Android phone, download and install the app named HTC Transfer Tool from the Play Store. Run it, confirm the PIN codes on both phones match, and then press Confirm.
Step 3: You are allowed to choose the data which you hope to transfer by ticking the boxes on your old Android phone. After that, tap Transfer/Start. Once the transfer is complete, press Done to complete the transfer process.
Xperia Transfer Mobile help users copy data from any mobile device to Sony Xperia device. Contacts, messages, photos, bookmarks etc. are all included, of course. Just check how can you transfer contacts from Android to Sony Xperia by using the app.
Step 1: On your old Android phone and Sony phone, install and launch the Xperia Transfer Mobile.
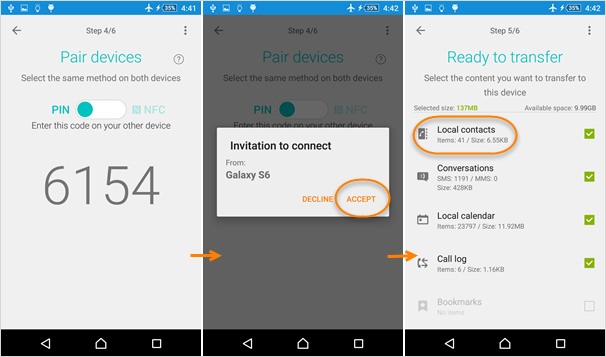
Step 2: Set your Sony as receiving device while your old Android phone as sending device. select the same connection method “Wireless” on the two devices.
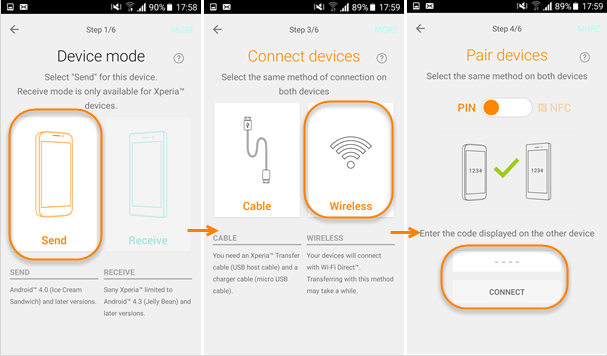 Step 3: Here you will see a pin code appears on your Sony, please enter the code on your Android so as to connect these two mobile phones, and tap “Accept” on Sony phone to allow the invitation to connect.
Step 4: Choose the contents which you need to get from Android to your Sony phone, after you tap the button “Transfer”, your previous data will start to be moved from your old Android phone to your new Sony phone.
Transfer contacts, SMS, photos, videos, music, app, call logs and so on from any Android to another Android with just one click, no matter Samsung, LG, Moto, HTC, Sony, Google Nexus. This Phone Transfer tool is pretty much convenient, compared with what I have mentioned above. Therefore, read on and find out how to use it!
Download WinDownload Mac
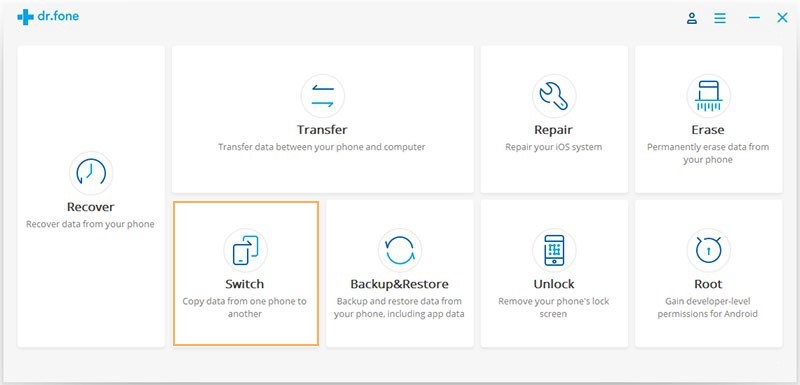
Step 1: Install Phone Transfer on your PC, run the software then click “Switch”.
 Step 2: Connect both of your Android phones to computer, Phone Transfer will detect them automatically. Here the leftward source represents your old Android phone, and the rightward source represents your new Android phone. The button “Flip” is to help you exchange their positions when necessary.
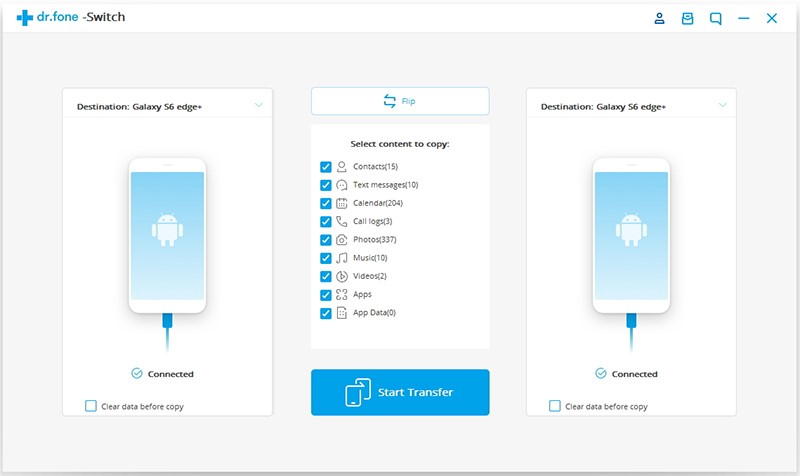 Step 3: If you only want to transfer contacts, you ought to remove marks before the corresponding content, and then click the blue button “Start Transfer”.
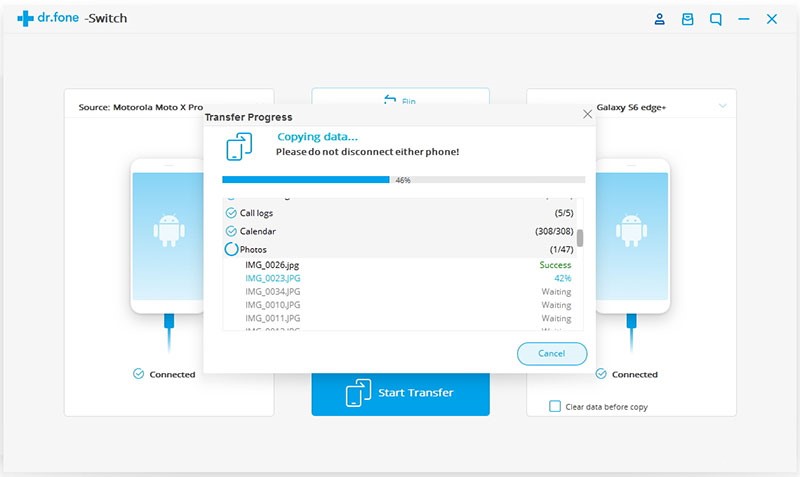 Note: The time taken to finish transfer process depends on the number of your wanted contacts, so keep patient here.