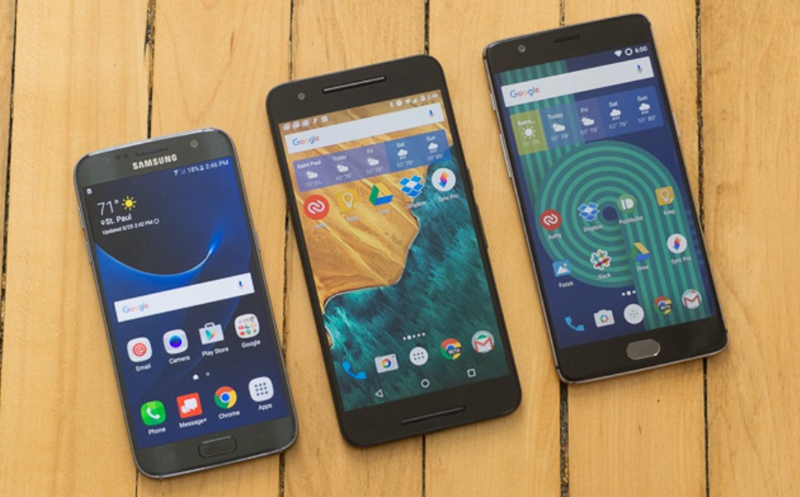
Gaining access to change or alter even the simplest things on your Android device or Google Nexus phone is a superpower that most of us desire. As a user, you simply sign in and are allowed to do certain things on your phone based on your user permissions. But won’t it be nice to have the permission to do anything to any file in any of the systems? Rooting your Android devices is the answers to your prayers.
Rooting has now become simpler. There is much-rooting software that is easily available that lets the user root their Google Nexus or Pixel phones with one click. But if you are unaware of the rooting process or how to gain access to rooting on Google Nexus phones, you must learn the process before you start. Want to know how? We have handpicked the most user-friendly software that guarantees hassle-free rooting process. We give you the full guide on how to root Google Nexus.
Part 1: One Single Click to Root Google Nexus/Pixel with Android Root Toolkit
Part 2: Root Google Nexus/Pixel Phone with iRoot
Part 3: Google Nexus/Pixel Root with OneClickRoot
If you are looking for reliable sources to uninstall unwanted apps and gain higher privileges to customise your Google Nexus then rooting your Google Nexus with Android Root toolkit would be your best bet. Android Root toolkit is by far the simplest and easiest way to root any Android device or any of the Google Nexus models. This remarkable tool is pretty easy to use and is 100% safe and secure for your Android devices.
Download WinDownload Mac
1. Firstly, download and install the software on your computer. Simply visit here and try the application for free.
2. Once the software is launched, simply select “Root” out of all the other feature.
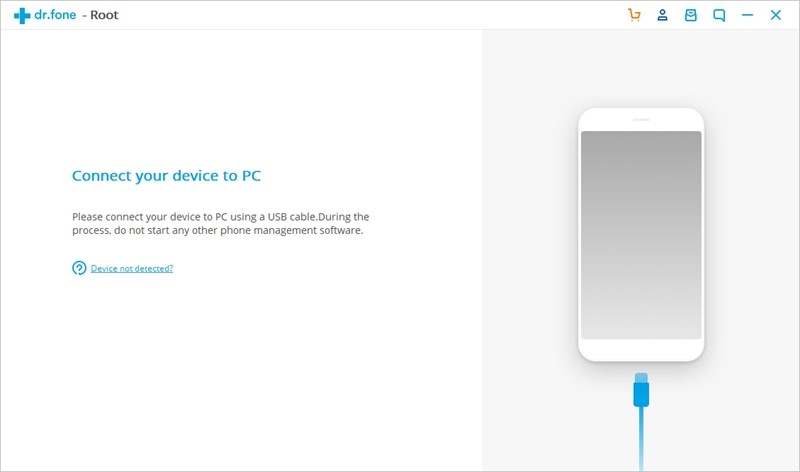
3. Time to connect your Nexus/Pixel device to the computer. You can also use a USB cable to connect. The interface would give you a prompt to connect your device.
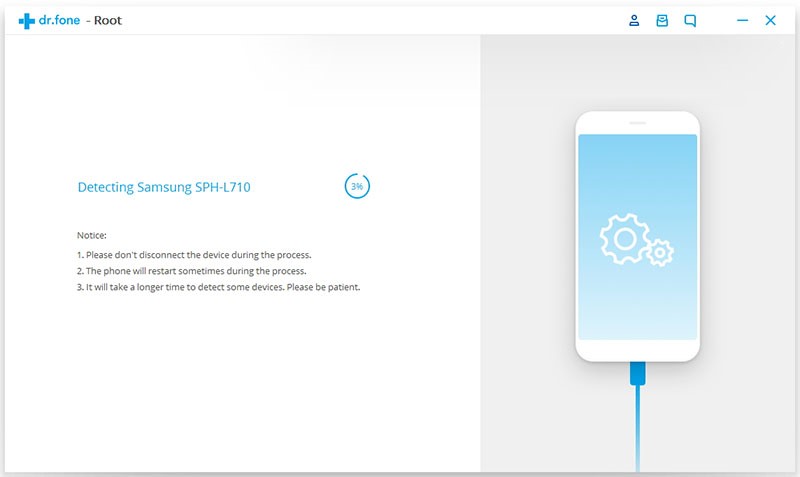
4. The moment the Nexus device is connected; application recognizes it automatically and comes up with the most feasible solution to root it.
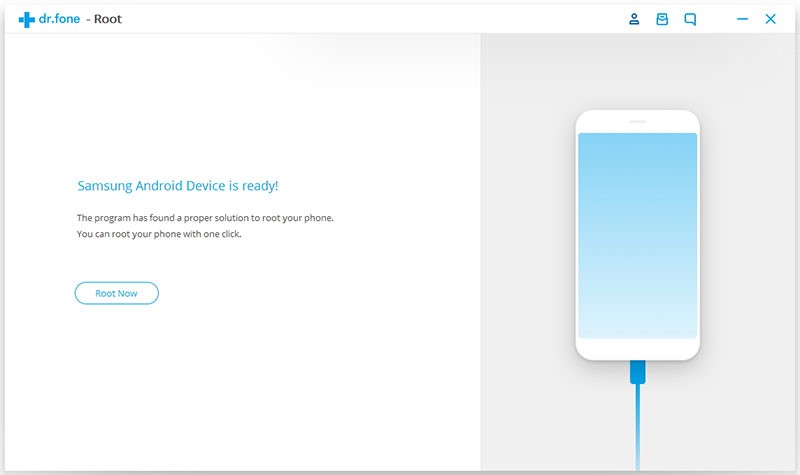
5. Once the complete detection is done and the entire required package is downloaded, it gives you the following prompt. You can simply click on the ‘Root now’ button for the process to commence.
6. In just a few seconds and with a single click, you would be able to root your device. A message asking you to continue would pop up. Confirm it and give the application a few minutes.
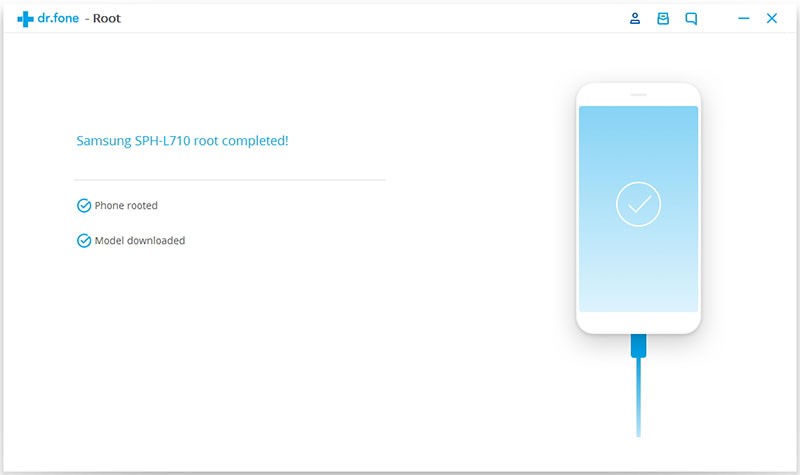
The rooting process will commence after a while and it will restart your device. With just a click of a button, you would be able to root Google Pixel/Nexus 6/6P/5/5X with the help of this amazing application.
Download WinDownload Mac
If you wish to try another alternative, then we suggest using iRoot. Even though the interface is quite different from Android Root toolkit, still it is a secure way to root your Google Nexus phones.
In order to boost your Google Nexus, iRoot can come across as one of the most powerful rooting systems, which is also famed to have a success rate of more than 90%. The secure technique of the iRoot software provides stability during the rooting process.
However, make sure that your phone is at least 70% charged before you take the following steps to root your Google Nexus 6/6P/5/5X.
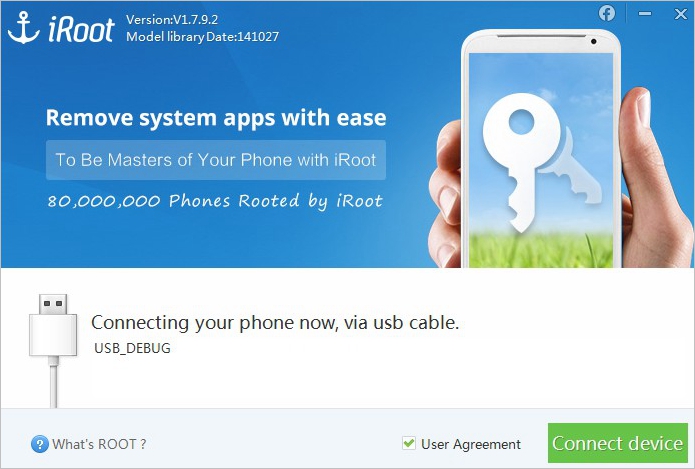
1. Begin by downloading and installing iRoot for PC on your computer.
2. Connect your phone to your PC and enable the USB Debugging option.
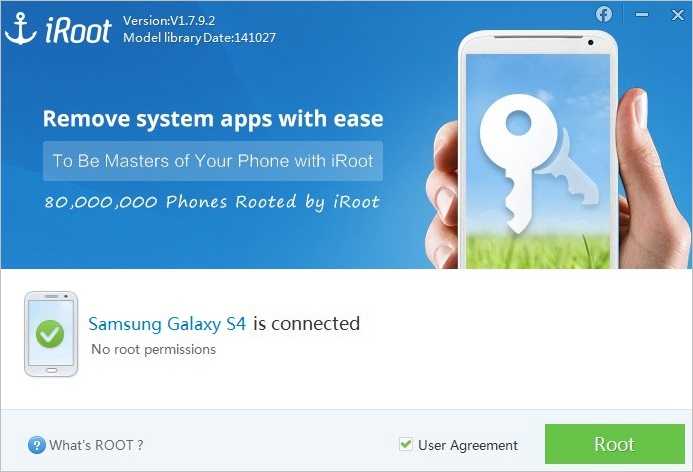
3. Once your device is automatically recognized by the application, you will see the following prompt like this. Simply click on the ‘Root’ button.
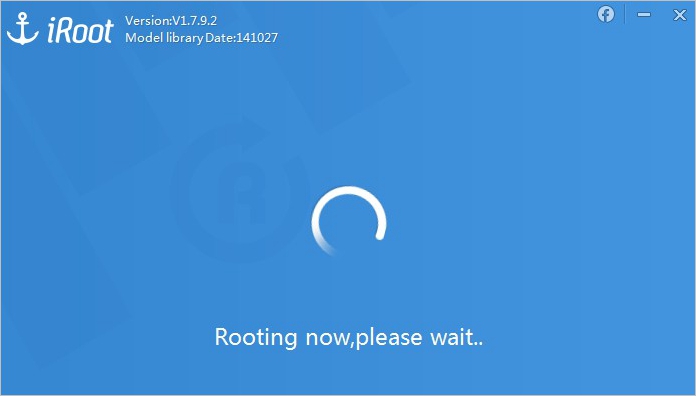
4. Give it some time and let the application root your device. After a while, it will prompt you as soon as the process would be completed. Finish rooting by clicking ‘Complete’ button.
If you are looking for a faster performance by your phone then rooting through OneClickRoot is one stop solution for that. OneClickRoot is one of the smartest rooting software available. It provides the simplest ways to root your Google Nexus phone or any other Android device. Simple root your phone with OneClickRoot and harness the full potential of your Android device.
OneClickRoot is the most user-friendly option that offers full technical support to you when you decide to undertake the rooting process.
Follow these easy steps and use the superpower of rooting.
1. Download the OneClickRoot for PC software from here for free. Once downloaded, install it on your computer.
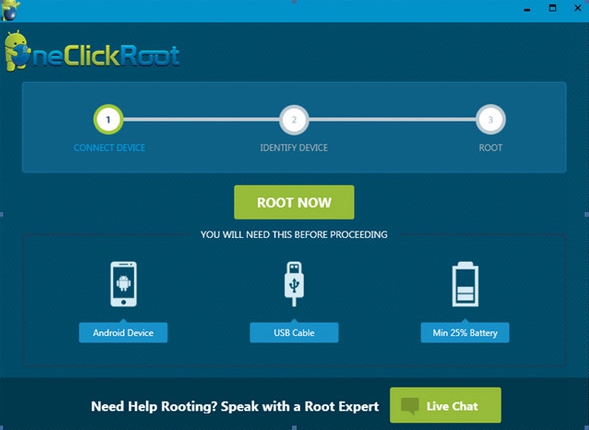
2. Make sure that you have enabled the USB Debugging option and then connect your device to the system. One Click Root will detect your phone automatically.
Next click on ‘Root Now’ button.
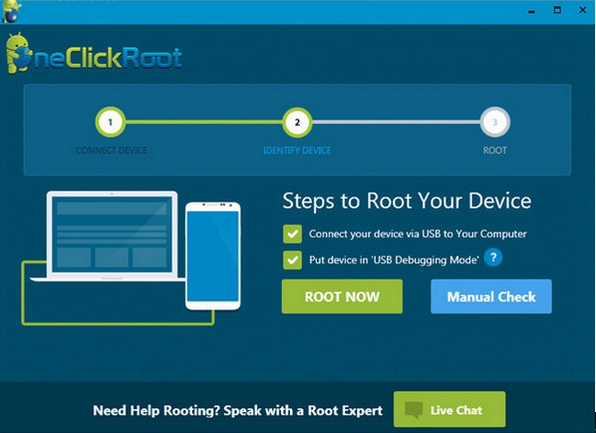
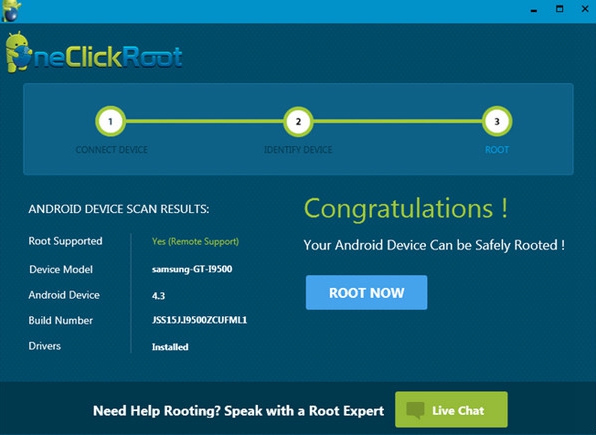
3. The rooting process will take minutes. , your device will be rooted.
Easy it may sound but taking few precautions before you take up the rooting process is very important. Make sure you have downloaded the drivers for your Google Nexus phone and taken the backup of your data before you follow the full guide on how to root your Google Nexus Phone. If you are a user who prefers the complete control over your phone then you may find rooting extremely helpful.
However, there may be users who do not care about this stuff at all. Any Android device, they may be happy with the appearance of the phone and software pre-downloaded in it. They may be happy with what they have in their hands.
So, whether you are worried about fixing it all or not fixing it at all or whatever reason you may have, every reason is a right reason to own a Google Nexus.