Performing factory reset is an effective solution for various Android phone problem like running slowly, system crash. Or when you’re going to sell your mobile phone, you need to clear all of your device data, so you’ll have to do factory reset. But before you start, it’s important to back up all your phone data because it’s obvious that you might lose all important data after factory reset.
Tips: Factory reset will delete all the data internal storage, include the contacts, messages, application data and multimedia files (documents, video, images, music, etc.). However, factory reset does not affect SD card in any way. All in SD card can still be saved well in SD card.
Once you are ready to reset your Android device, refer to the following passage.
Part 1: Factory Reset Android Device from Settings Menu
Part 2: Hard Reset Android Device in Recovery Mode
Part 3: Completely Back up your Phone Data before Factory Reset
Part 4: Restore Data after Factory Reset
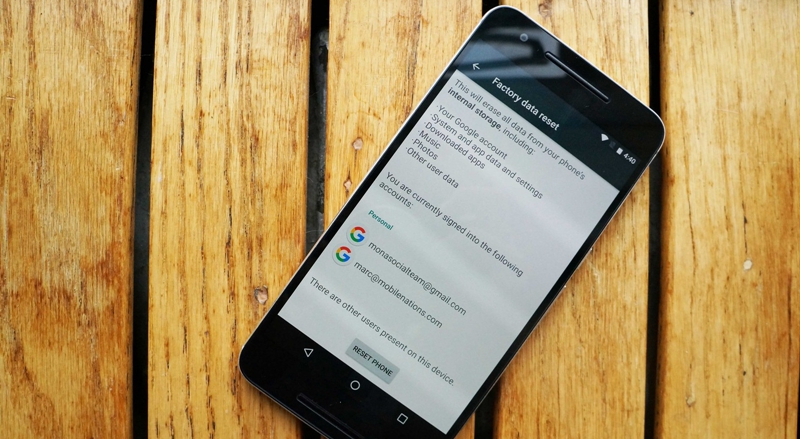
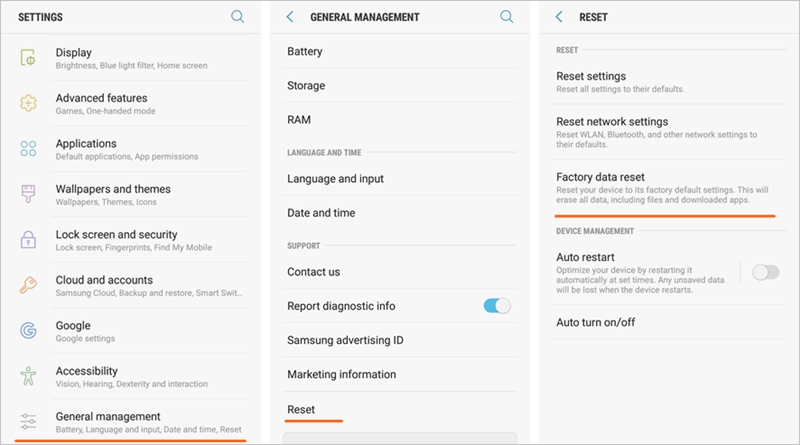
If your phone is running properly and you can enter the Settings menu, the easiest way to reset an Android device is to reset in the settings menu. Even you are using Samsung device and the Home button is broken.
Go to Settings > Backup & reset > Factory data reset > Reset phone. Tap on the “Reset phone” option and your phone will restart automatically and turns to factory reset.
If your device cannot boot up properly and even touch screen isn’t workable when some system issue happened, the only alternative for you is to hard reset your phone in recovery mode.
Step 1: Power off your device.
Step 2: Boot your phone into recovery mode
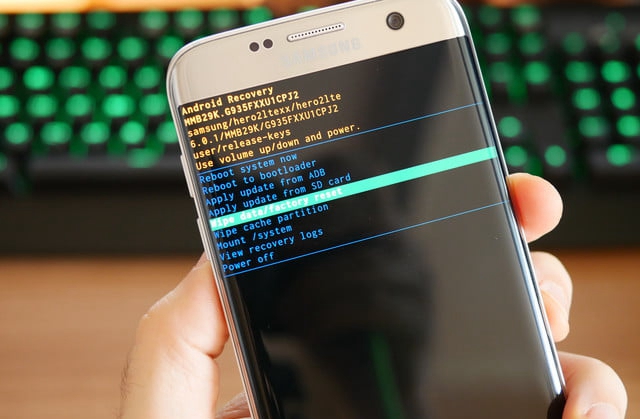
For Samsung device:
Press and hold the Volume Up button + Home button (or Bixby button for Samsung S8/Note8)+ Power buttons together for about 10 seconds until you get the software update screen.
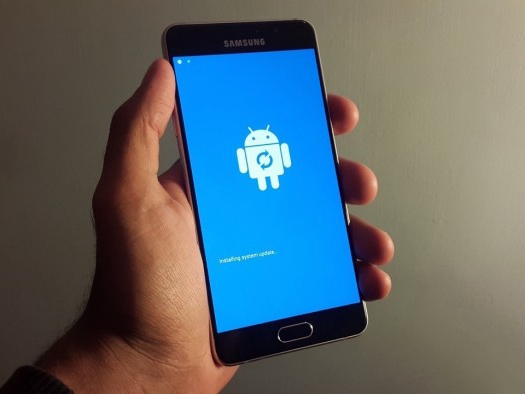
Release the button and wait for the software updata time out, and you will see a big “!” logo in the screen.
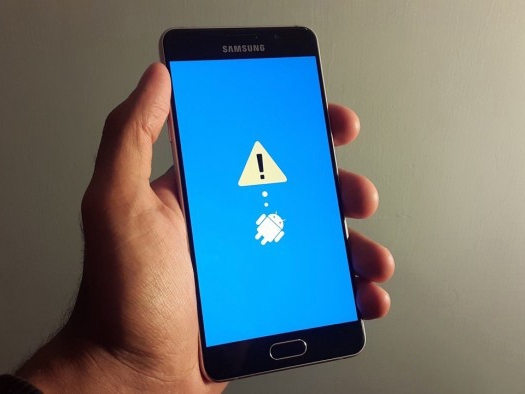
About 1 minute later it will go to the Recovery mode.
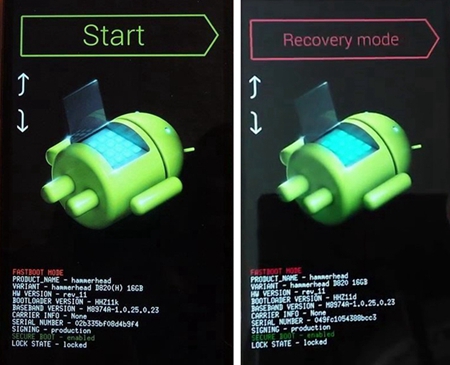
For Google Nexus/Pixel and Moto:
Long press the Power button and Volume Down button simultaneously for about 10 seconds until you see “Start” at the top and an Android mascot.
Press Volume down twice, then you will see Recovery mode in red up at the top right. Press the Power key to select it to boot into the recovery mode.
For LG device
Press and hold the Power key and the Volume down key at the same time until the LG logo appears, then release the Power key and then press it again (you should keep pressing the Volume down key throughout). Now you should be in the recovery mode.
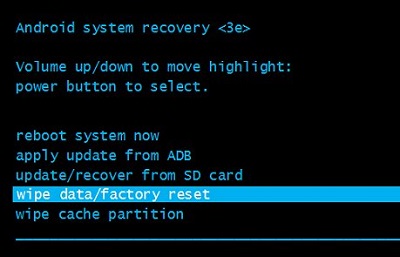
Step 3. Press Volume Up/Down key to scroll up or down through the options. Move to “Wipe data/Factory reset” and confirm it by pressing Power button.
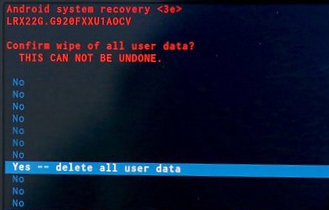
Step 4. Use Volume keys to move to the option “Yes-delete all user data” and press Power button to select. Then your data will be entirely deleted permanently.
Step 5. Once your phone finish resetting, select the “Reboot now” by volume key and power button to confirm your choice. Device will restart and boot into normal mode.
Note: In case your device stuck halfway, hold the Power button to power off device and then repeat the steps from the first step.
However, as mentioned above, the device will be erased cleanly. If you still want to save the previous data, all or part of it can be got back from previous backup prior to factory reset.
Android Data Backup & Restore toolkit can be the best choice to help you. It is consistent in managing your data from backup to restore. With this toolkit, you are allowed to conveniently backup and restore your data when factory reset your phone. It just needs several clicks and a few minutes, handy to manage your data.
Download WinDownload Mac
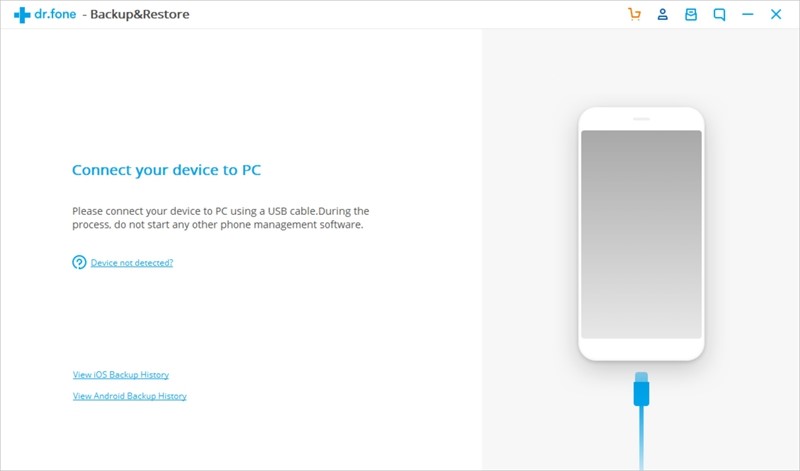
Step 1. Run the Android Backup & Restore toolkit on PC and connect your phone to PC.
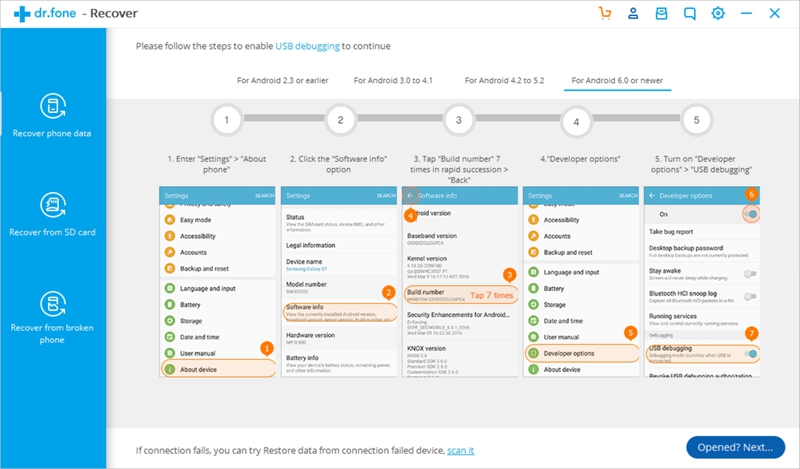
You need to make sure the USB debugging enabled. If you haven’t turned on the USB debugging, just follow the instructions on the window to turn it on.
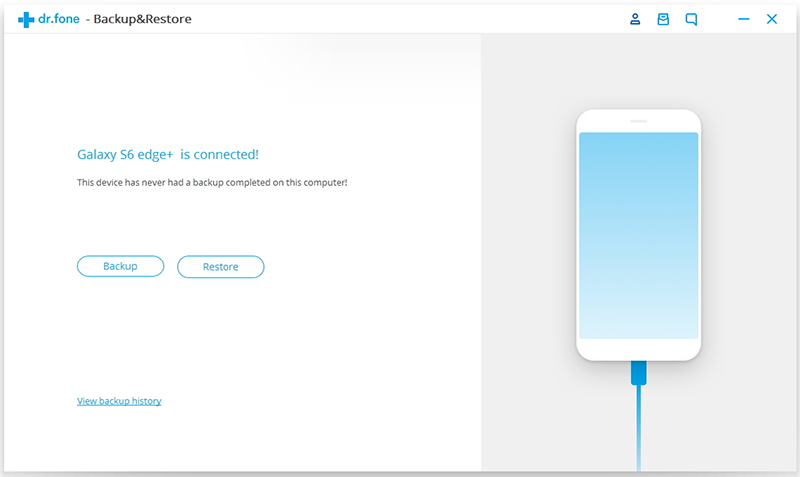
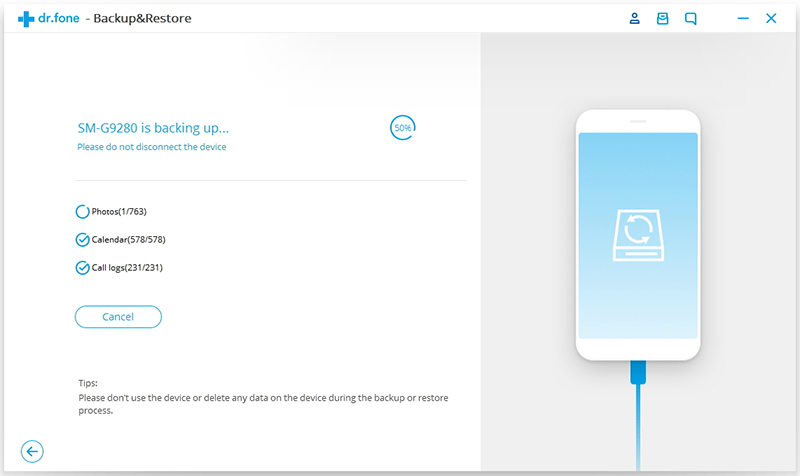
Step 2. Click button “Backup” to start backing up once your device connected successfully.
Step 3. The software will display all the supported data, like Photos & Videos, Messages & Call Logs, Contacts, Memos and other data and all of them are selected by default, you can uncheck the file types you don’t need to save your time. To selectively backup your App data, you can click the rightward arrow next to the Application data to get the not showing data types.
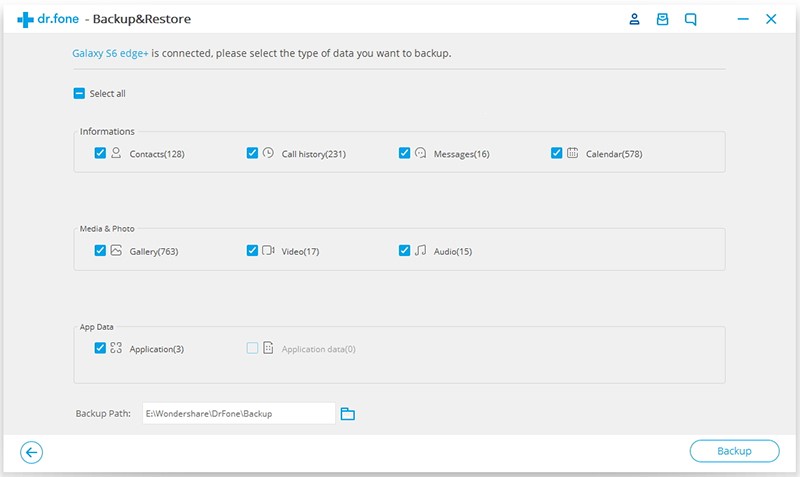
At last, click the button “Backup” at bottom.
Step 4. It will take a few minutes to finish the backup. During the process, stop using your phone. When the backup is completed, you can preview the backup data by clicking “View the backup”
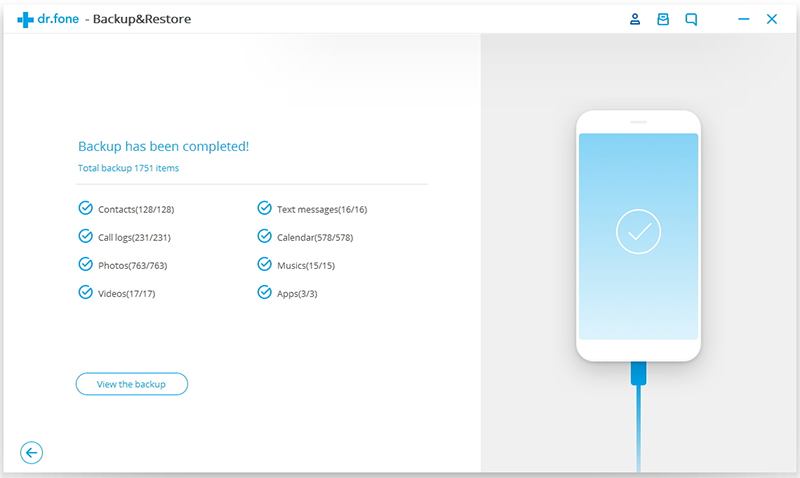
Pretty good, so you have successfully made the backup of all your data on your Android device to your computer before moving with factory reset. After successful factory reset, you have to restore your backup files to your phone so that you can continue using the data and settings you previously had. Android Data Backup & Restore toolkit can stand out again to carry the task of restoring your device data.
Android Data Backup & Restore is definitely compatible with most Android devices. Except the advantages said above, the most important is that you are supported to view your backup content at any time, and select the specific data to restore what you like, giving out the ones you don’t want. Learn the steps to restore after reset.
Download WinDownload Mac
Step 1. Run the toolkit on computer. Select the feature “Data Backup & Restore” from the dashboard.
Step 2. You will be prompted to connect your device, plug your Android device into computer at once. When you see the next window, click on “Restore” to begin the restoration.

Note: If you only want to view the backup content, just click on “View the backup history” without plug your phone.
Step 3. The software will display the latest backup history by default, click on the drop-down arrow in the top left to choose other backup files.
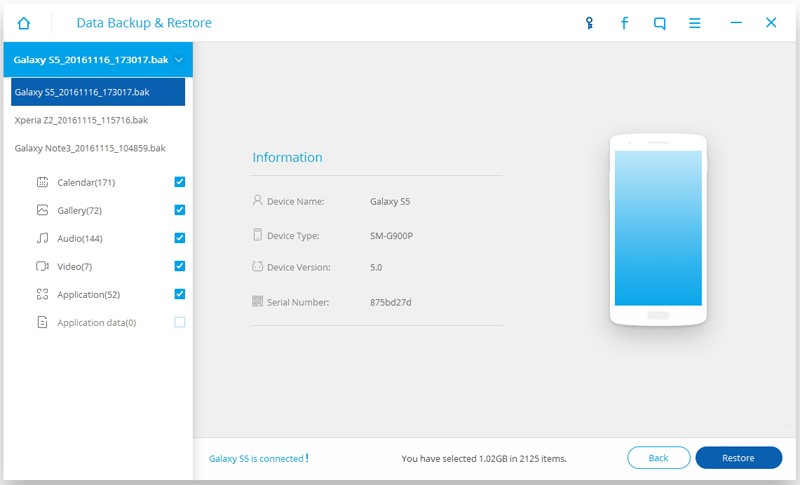
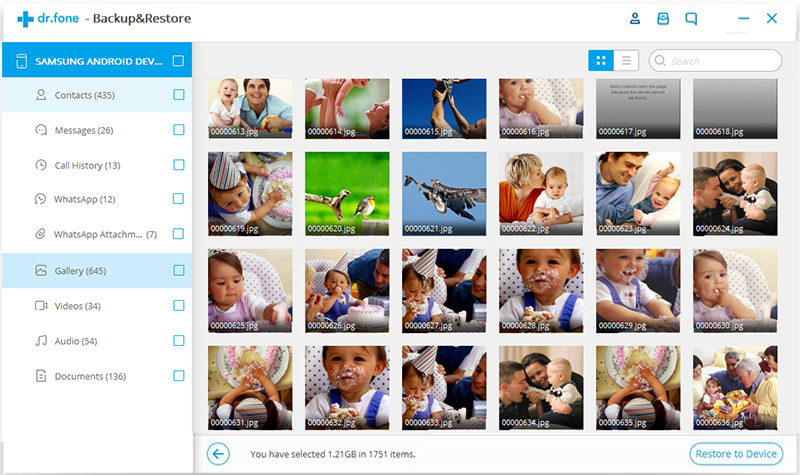
You will see the data type backed up by left side, and the relatively specific data on the main window.
You can select the special ones to restore by checking the checkbox, then click Restore button. The data you selected will be restored to your phone within minutes.
 Download WinDownload Mac
This tutorial shows you how to reset Android device and what was needed before and after reset. It’s quite inconvenient that you can’t backup and restore all your phone data with Google account or Google Drive and you may lose your data after factory reset. But with the help of Android Data Backup & Restore toolkit, you can easily backup and restore all your phone data with one click. Keep your data in safety and save your time.