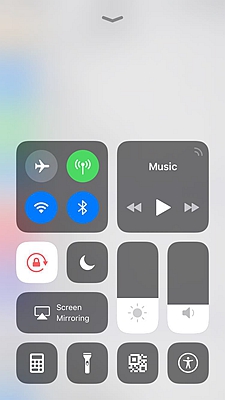
The inclusion of the new control center feature in the iPhone devices which began with iOS version 11 brought about several benefits. iPhone users could easily access and control commonly used apps and functions on their devices. This was in contrast with the earlier versions where the settings functionalities could only be accessed through launching the Settings app. With just a simple swipe, users who have enabled control center functionality can get a quick access of the selected controls within their device.
If you have been struggling to find out how you can customize your device control center, then you need not struggle anymore. This article will give you comprehensive details on how to customize Control Center on iPhone X/XS/XR iOS 12. If you have a different version of iPhone, you should not feel left out. The procedure on how to do this is more or less the same. Thus read through up to the end and get to know how you can customize the control center.
How to Add or Remove Controls in Control Center
How to Organize the Order of Controls in Control Center
How to Add QR Code Scanner to Control Center
This first section on how to customize Control Center on iPhone X/XS/XR iOS 12 will give you details on how to add or remove controls on your control center. This is important as it ensures that only your desired controls and functionalities appear in the control center. Removing controls which are not frequently accessed from the control center will also reduce the clatter which results when many functionalities are put on the control center screen.
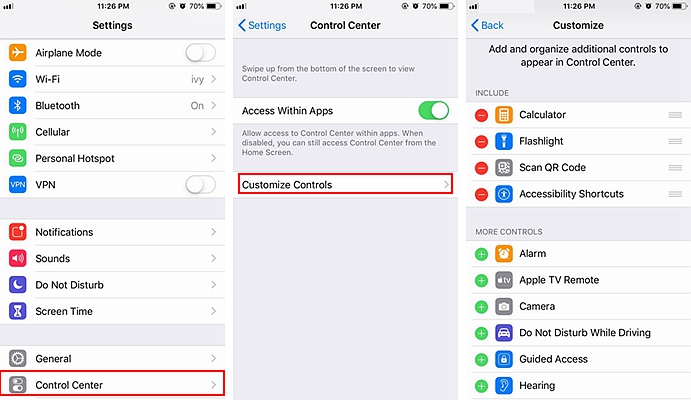
1. Tap on the Settings app to launch it.
2. Swipe downwards and select the ‘Control Center’ menu option. Usually, the control center settings come after the notifications settings. Tapping on “control center” will bring a new screen interface.
3. From the Control Center interface, look for ‘Customize Controls’ and tap it.
4. Check for the ‘More Controls’ option. Under this menu title, you will find a list of controls and functionalities which you can add to your Control center.
The controls which have not been added to the control center will have a Green Plus button (+) against them while those which have already been added will have a Red subtraction button (-) against them.
5. To add a specific control or functionality to your control center, select the Add icon (+) which appears against such a control. By doing this you will have successfully added the new control.
6. To remove a control just tap on the red subtraction button against such a control. Use this procedure to remove those controls which you don’t often use and reduce the clatter on the Control center.
Note:
1. You should also note that there are certain fixed controls on the control center which cannot be removed. These include controls such as Wi-Fi functionality and the Flight Mode control among others.
2. Before delving into details on how to add and remove controls on the control center, it is crucial to note that you need to have the control center enabled. In most cases, the control center is set on by default but for the rare cases where it is off, you need to put it on. To do this, go to settings, swipe downwards to find the control center functionality. Tap the switch button to toggle it from off to on.
Organizing your controls is advisable as it will help you reduce the amount of time needed to find a given control, and improve the overall layout of your control center. Below is the procedure on how to do that.
1. First, launch the setting app and select the control center option.
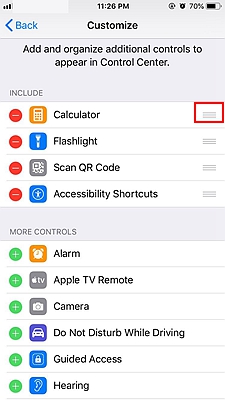
2. Tap on ‘Customize Controls’ menu to access the ‘Include’ section which has a list of all included controls.
3. On the right side of each control, you will see three horizontal lines. Press and hold on these set of horizontal lines. Then drag the control which appears against the held horizontal lines and rearrange it on the list. This same order will be used to display these controls on the control center screen.
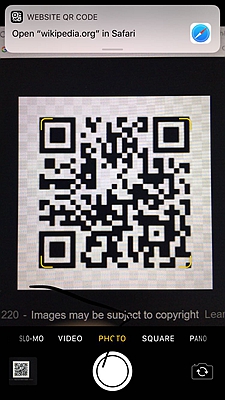
This third section on how to customize Control Center on iPhone X/XS/XR iOS 12 will give you a step by step method on how you can add QR code scanner to the control center of your device. Be sure to try this on your iOS version 12 device.
1. Go to Settings > control center > ‘Customize controls’ option.
2. Find the ‘Scan QR Code’ control and tap the Plus (+) button against it. The QR code control will be added on the ‘Include’ section. You can tap and hold on the three lines against the control to drag and position this new control at your desired location.
3. To access the QR code scanner from the control center, open the control center first. For iPhone X, and those running iOS 12 or any other later version, swipe down the screen from the right corner at the top to open the control center. Tapping on the scanner widget will open the camera to facilitate the QR code scanning.
The control center is one of the crucial features of iOS smart devices. Customizing it properly will help you save much time since you will be able to access frequently used functionalities easily. Thus maximize on this shortcuts feature and enjoy the benefits.